
Ice Melt Spreader Guide – Even Application, Tool Types, Efficiency
Imagine spending hours clearing your driveway only to watch ice reform because your spreader deposited salt unevenly across the surface. You’re not alone in this frustration, and the solution often lies in selecting the right tool and mastering proper technique. Whether you’re managing a small walkway or an expansive parking lot, understanding spreader types and calibration methods can transform your winter maintenance routine from wasteful guesswork into precise, efficient ice control.
Understanding How Ice Melt Spreaders Work
When you’re battling icy sidewalks and driveways, an ice melt spreader becomes your most valuable tool for effective and even distribution. These devices operate through controlled dispensing mechanisms that regulate product flow as you move across surfaces.
The core principle involves gravity-fed hoppers combined with adjustable gate settings. You control the spread rate by modifying the opening size, which determines how much material falls onto the rotating plate or drop mechanism below.
Adjustable gate settings let you control exactly how much ice melt reaches the surface below.
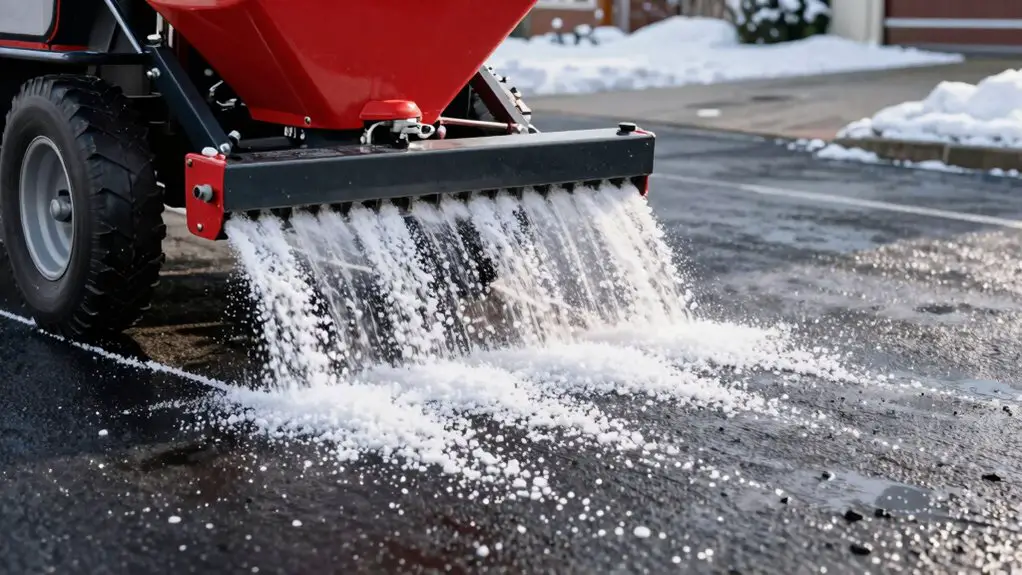
Rotary spreaders use centrifugal force to cast granules in wide arcs, while drop spreaders release product directly beneath the hopper for precise placement.
Your walking speed directly impacts coverage density. Moving too quickly creates sparse distribution; too slowly wastes product. Mastering the relationship between gate settings, pace, and terrain guarantees you’ll achieve ideal ice-melting results every application.
Handheld Spreaders for Small Residential Areas
For homeowners with modest walkways, porches, and short driveways, handheld spreaders offer the perfect balance of control and convenience.
These compact tools typically hold one to three pounds of ice melt, allowing you to target specific areas without waste.
You’ll find two primary designs: crank-operated rotary models and shaker-style containers.
Crank spreaders disperse material in a fan pattern, covering wider swaths efficiently. Shaker types let you direct granules precisely along narrow paths and stairs.
When selecting your handheld spreader, prioritize corrosion-resistant materials like stainless steel or treated plastics.
Check the aperture settings—adjustable openings give you control over application rates for different ice melt products.
Store your spreader empty and clean after each use.
Residual salt accelerates deterioration, shortening your tool’s functional lifespan considerably.
Walk-Behind Broadcast Spreaders for Medium Properties
Walk-behind broadcast spreaders become essential once your property exceeds what handheld tools can reasonably manage. These units distribute ice melt in a wide, fan-shaped pattern through a spinning disk mechanism, allowing you to cover driveways, walkways, and parking areas efficiently.
You’ll achieve coverage rates of 6 to 12 feet wide depending on your model and settings.
For medium properties between 5,000 and 20,000 square feet, select a spreader with a hopper capacity of 50 to 80 pounds. Calibrate your spread rate using the manufacturer’s settings as a baseline, then adjust based on your specific ice melt product’s density.
Maintain consistent walking speed—approximately 3 mph—to guarantee uniform distribution. Clean the mechanism after each use to prevent corrosion and maintain accurate spread patterns throughout the season.
Drop Spreaders for Precise Application Control
Drop spreaders sacrifice coverage width for pinpoint accuracy, releasing ice melt directly beneath the hopper through a series of holes along the bottom.
You’ll achieve surgical precision along sidewalk edges, around landscaping, and near sensitive surfaces where broadcast spreaders would cause collateral damage.
The controlled drop pattern eliminates wind drift entirely, making these tools ideal for treating narrow walkways and defined pathways.
You’re depositing material exactly where your wheels track—nothing more, nothing less.
When operating a drop spreader, maintain consistent walking speed to guarantee uniform distribution.
Overlapping passes by one to two inches prevents untreated strips between rows.
Calibrate your gate settings carefully; the hole openings directly determine application rate.
Drop spreaders demand more passes to cover equivalent area, but the precision payoff justifies the additional effort for detail-oriented applications.
Tow-Behind Spreaders for Large Commercial Properties
Sprawling parking lots, corporate campuses, and industrial complexes demand equipment that matches their scale—tow-behind spreaders deliver exactly that capability.
You’ll attach these units to ATVs, UTVs, or tractors, transforming your vehicle into a high-capacity distribution system. Hopper sizes range from 85 to 200+ pounds, allowing you to cover acres without constant refilling. The mechanical drive systems sync spread rates to your travel speed, ensuring consistent coverage regardless of pace changes.
When selecting a tow-behind model, prioritize corrosion-resistant hoppers and adjustable spread widths up to 12 feet.
You’ll want pneumatic tires for stability across uneven terrain and a reliable agitator to prevent material bridging in humid conditions.
Master your spread patterns by making overlapping passes, maintaining steady speeds between 3-5 mph for ideal distribution density.
Choosing the Right Spreader for Your Property Size
Matching your spreader to your property’s square footage prevents both wasted time and uneven coverage.
For residential driveways and walkways under 2,000 square feet, a handheld spreader delivers precise control without excess bulk. You’ll maneuver easily around obstacles and store the unit compactly.
Properties spanning 2,000 to 10,000 square feet demand walk-behind broadcast spreaders. These units balance capacity with maneuverability, letting you cover parking lots and multi-path complexes efficiently.
Walk-behind broadcast spreaders hit the sweet spot for mid-sized properties—big enough to work fast, small enough to stay nimble.
Once you’re managing areas exceeding 10,000 square feet, tow-behind spreaders become essential. Attempting smaller equipment at this scale wastes hours and produces inconsistent results.
Calculate your total coverage area before purchasing. Factor in pathways, entrances, and emergency access routes—not just primary surfaces.
The right match maximizes efficiency per pound of ice melt while minimizing your labor investment.
Calibrating Your Spreader for Optimal Ice Melt Distribution
Because even the best spreader wastes ice melt without proper calibration, you’ll want to adjust your settings before tackling winter’s first storm.
Start by consulting your spreader’s manual for baseline settings specific to your ice melt product. Different formulations—rock salt, calcium chloride, magnesium chloride—require distinct spread rates and aperture sizes.
Perform a catch test to verify accuracy. Spread product over a measured area onto a tarp, then weigh the collected material. Compare results against the manufacturer’s recommended application rate, typically 2-4 ounces per square yard for most conditions.
Fine-tune your walking speed alongside gate settings. Moving too quickly creates sparse coverage; too slowly produces wasteful buildup.
Mark your best settings with tape or paint for quick reference throughout the season.
Techniques for Achieving Even Coverage Every Time
While proper calibration sets the foundation, your spreading technique ultimately determines whether ice melt lands where you need it. Maintain a consistent walking pace—approximately two to three miles per hour—to guarantee uniform distribution. Overlap each pass by six inches to eliminate gaps without wasting product.
Your spreading technique determines success—walk at two to three miles per hour and overlap passes by six inches.
For broadcast spreaders, use a systematic pattern. Start along edges, then work in parallel lines across the surface. Keep the hopper at waist height and swing your arm in steady, controlled arcs.
Push spreaders demand straight, deliberate paths. Avoid sudden stops or speed changes that create concentrated deposits. When covering large areas, divide them into manageable sections and complete each before moving forward.
Monitor wind conditions closely. Adjust your walking direction to work with crosswinds, preventing drift onto landscaping or vehicles.
Maintaining Your Spreader for Long-Term Performance
Your spreading technique only delivers consistent results when your equipment stays in top condition.
After each use, remove residual ice melt from the hopper, agitator, and dispensing mechanism. Salt compounds corrode metal components rapidly when left to accumulate.
Rinse all surfaces with fresh water, then dry thoroughly before storage. Apply food-grade lubricant to moving parts, including the gear assembly, axle bearings, and flow control lever.
Inspect the impeller plate for wear patterns that indicate uneven distribution.
Store your spreader in a dry, temperature-controlled environment. Moisture accelerates rust formation on exposed metal, while extreme cold can crack plastic hoppers.
Check calibration settings at the start of each season, as components shift during storage.
Replace worn agitator fins and damaged screens immediately to maintain precise application rates.
Reducing Waste and Environmental Impact Through Proper Application
When you apply ice melt precisely, you protect both your wallet and local waterways.
Excess chloride compounds don’t simply disappear—they migrate into soil, groundwater, and storm drains, accumulating in ecosystems where they damage vegetation and aquatic life.
Calibrate your spreader to dispense the manufacturer’s recommended rate per square foot. You’ll achieve effective melting without saturating surfaces unnecessarily.
Target high-traffic zones and hazardous slopes rather than broadcasting uniformly across every inch of pavement.
Pre-treat surfaces before storms when possible. This preventive approach requires 25-50% less material than reactive applications on accumulated ice.
Store unused product in sealed containers to prevent moisture absorption, which causes clumping and inconsistent distribution.
Each strategic choice compounds into significant environmental and financial savings across the winter season.