
How to Install Floating Shelves: A Beginner’s Guide
Did you know that 75% of first-time homeowners attempt a DIY project within their first year? Installing floating shelves is a rewarding way to join that statistic while enhancing your living space with both style and function. If you’re unsure where to begin, don’t worry—it’s simpler than it seems. First, you’ll need to gather some essential tools. But there’s more to take into account, from wall types to material choice, to guarantee stability and sleek results. Before you even pick up a drill, there’s a vital step you shouldn’t skip. Want to know what it is? Let’s explore further.
Preparing for Installation
Preparing for the installation of floating shelves involves a precise and systematic approach to guarantee a secure and level outcome. First, gather essential tools: a stud finder, pencil, level, drill with the appropriate drill bit, and a screwdriver.
Next, select hardware that matches your shelf’s design requirements. You’ll need dowel connectors that correspond with the pre-drilled holes in your shelves and wall, wall anchors for drywall or plaster where no studs exist, rod brackets for concealed support, and screws along with nails. It is crucial to consider the weight distribution when choosing hardware, as heavier loads will require stronger support.
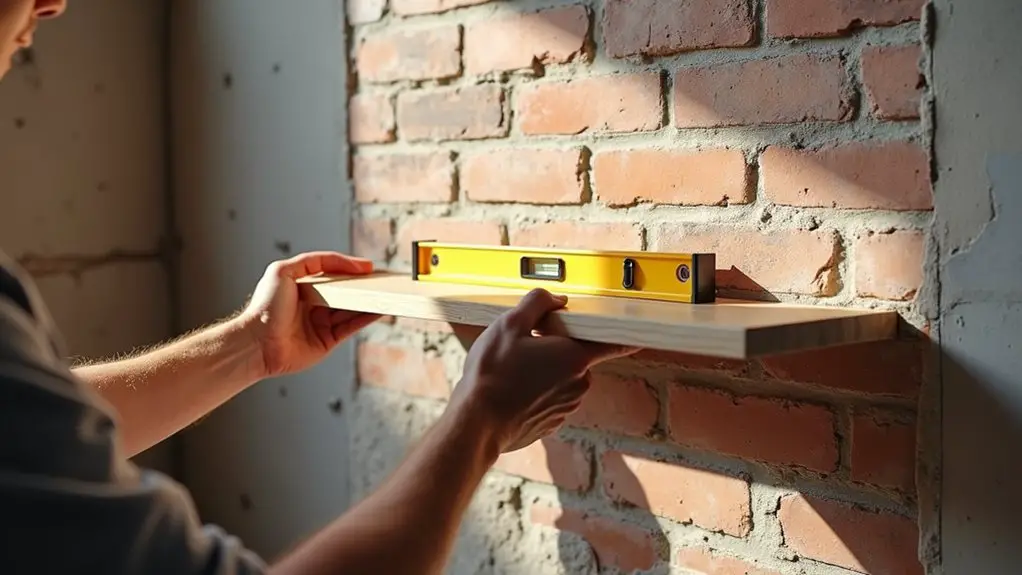
Preparing the shelf and the wall guarantees seamless assembly. Examine your shelf for pre-drilled holes; if absent, use a drill bit suitable for its material. Accurately mark your desired shelf location with a pencil and employ a level to trace a horizontal line across it.
A stud finder is essential for detecting and marking stud locations on the wall. For ideal weight distribution and support, estimate the weight burden the shelf will bear. Opt for larger or additional dowels to bolster heavier loads, and secure brackets directly into studs whenever possible.
Consider wall material, adjusting your approach accordingly for drywall or plaster stability.
Installing the Brackets
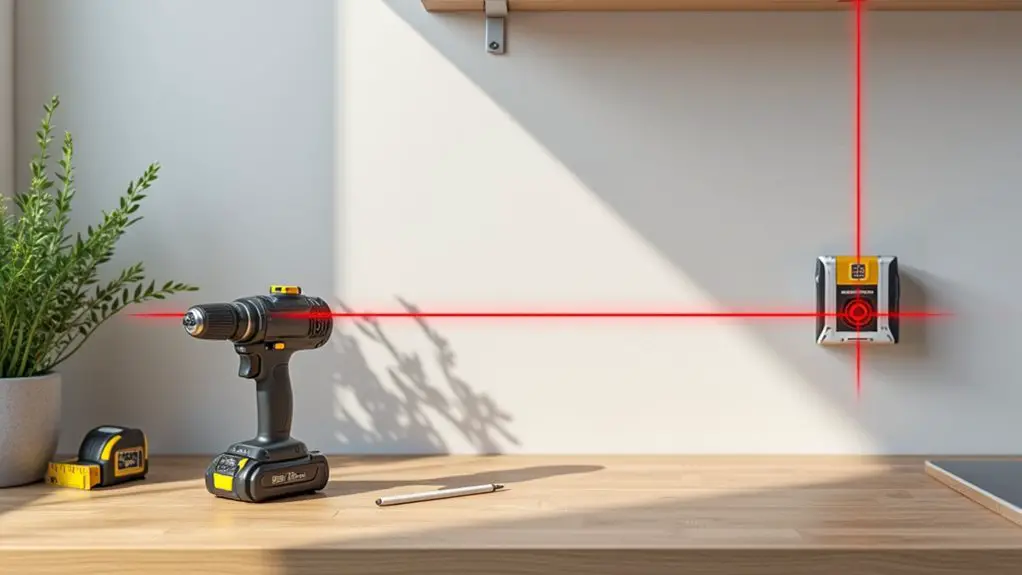
To begin installing the brackets for your floating shelves, first locate the wall studs using a stud finder. This guarantees your shelves are securely fastened and capable of supporting weight. If you’re planning to use a shelf depth between 7 to 12 inches, ensure the brackets you choose can accommodate this range for a stable installation.
Once you’ve identified the studs, carefully mark the wall with a pencil where each bracket will be placed. It’s essential to draw vertical lines with a level, as this assures the brackets align perfectly.
Drill pilot holes where you’ve marked, using a drill bit that matches your screws’ diameter. If studs are absent at the desired location, insert heavy-duty anchors to provide necessary support, especially for drywall installations.
Proceed by securing the brackets to the wall with screws, making sure they’re tightly fastened for maximum stability.
Steps to Install Brackets:
- Locate and Mark: Use a stud finder to locate studs and mark with pencil for bracket placement.
- Level Lines: Draw vertical lines with a level for accurate bracket alignment.
- Drill Pilot Holes: Drill holes with the correct bit size at marked locations.
- Secure Brackets: Use screws or heavy-duty anchors to fasten brackets tightly to the wall.
Check the alignment and adjust if necessary to maintain even spacing, guaranteeing both aesthetics and structural soundness.
Double-check your measurements before drilling to avoid mistakes.
Handling Different Wall Types
When installing floating shelves, successfully handling different wall types often hinges on understanding their unique demands. Begin by identifying whether the walls are made of drywall, plaster, or tile. Use a stud finder to locate studs within drywall or plaster walls, confirming their typical spacing of 16 inches apart. Securely mount brackets to these studs for ideal support, making certain they’re perfectly level to prevent the shelf from tilting.
For drywall with no stud access, opt for drywall anchors, tapping softly to detect hollow zones before drilling. Use a drill bit smaller than your screws and take care to avoid over-tightening to maintain wall integrity. Floating shelves add eye-catching accents to any room, enhancing the overall decor seamlessly.
When dealing with tile or other hard surfaces, invest in custom fabricated brackets or specialized hardware. Gently remove minimal surface material to accommodate the brackets, making sure they’re level before proceeding. Utilize a router if creating additional space is necessary.
For plaster walls similar to drywall, identify stud locations when possible. In their absence, plaster anchors offer reinforcement. Again, employ a smaller drill bit to initially pierce the surface, minimizing potential plaster damage. Following these precise methods guarantees floating shelves remain stable, melding both function and form seamlessly in any living space.
Installing the Shelf
Floating shelves can be a practical yet stylish addition to any space when installed expertly. First, determine the perfect position on your wall by measuring carefully. Use a level to confirm the shelf will be straight, and mark the shelf’s outline with a pencil. Remember to check for electrical wires or plumbing in the wall to avoid any mishaps. Floating shelves are easy to install if you have basic tools and follow clear instructions.
Once the position is determined and marked, it’s time to focus on attaching the brackets firmly and accurately.
- Identify Wall Studs: Use a stud finder to locate wall studs, which are essential for support. Mark the location of the studs where the bracket holes will align.
- Drill Pilot Holes: Create pilot holes using a drill bit that matches your screws or anchors. Verify these holes are vertically aligned and centered to maintain balance.
- Affix Brackets: Align the bracket with your marked holes. Adjust for levelness with a level tool and fix the brackets securely using screws, either directly into studs or with wall anchors.
- Attach and Align the Shelf: Slide the shelf onto the bracket extensions. Align and secure using appropriate screws, confirming the shelf is level and stable. Double-check everything for safety and aesthetics.
Choosing the Right Materials
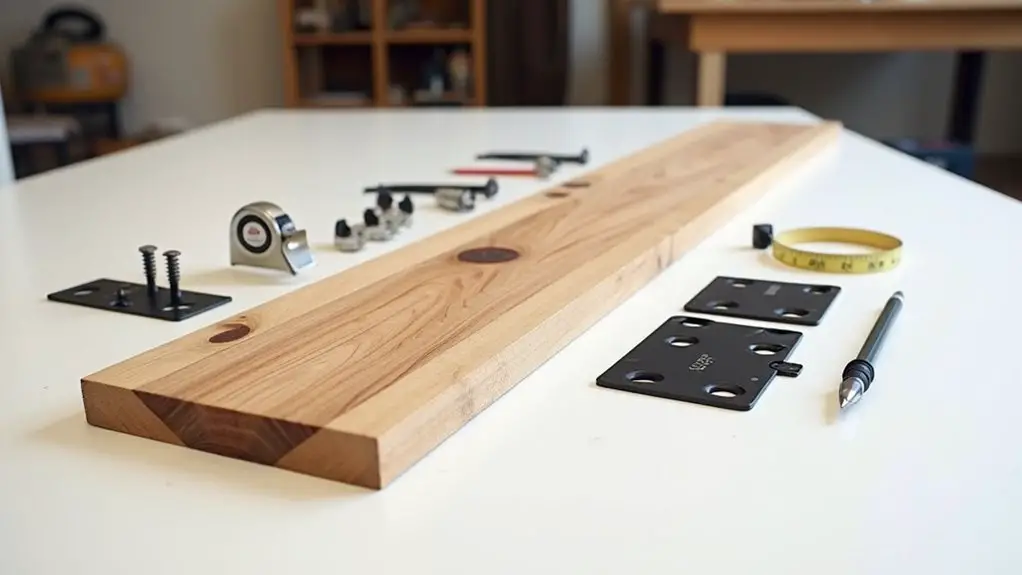
Selecting the right materials for your floating shelves boils down to understanding the specific requirements and aesthetics of your space.
Begin by considering wood types. Maple provides a hard, durable option with a rustic smoothness—perfect for modern settings. Maple’s warm, natural appearance makes it a popular choice for contemporary home decor. Confirm sealed protection to enhance its scratch resistance, even though it’s not weather-resistant.
Teak stands out for outdoor use due to its natural oils and resistance to elements, though it comes at a premium price.
If affordability and ease of use matter, pine wood is ideal. It has a natural white or yellow tone with knots. Stain it to bring out its beauty, but add a protective finish for longevity.
For a luxurious look, walnut offers rich tones and stability, complementing high-end interiors, yet it’s the priciest choice.
If engineered wood suits your project, MDF is an economical option with robust properties, perfect for indoor applications. Its strength against warping makes it versatile for paint finishes, though keep it away from moisture.
When evaluating wood weight capacity, hardwoods like oak or maple handle heavier loads, whereas softwoods like pine are for lighter decor.
Final Checks and Decor
Before completing your floating shelves project, it’s crucial to conduct a series of final checks to guarantee safety and stability. First, use a level or your smartphone’s integrated level app to verify the shelf is perfectly horizontal. This ensures not only functionality but also aesthetic precision.
Next, meticulously verify that all screws and anchors are securely fastened without being over-tightened. Over-tightening can damage walls or impact hidden components like wires or pipes. If you’re unable to attach your shelves to wall studs, be sure to use wall anchors as an alternative for adequate support and stability.
The shelf should be firmly attached, capable of supporting its intended load without sagging or tipping. Finally, examine for visible brackets or hardware to confirm they’re aligned or concealed to your satisfaction.
Now, onto decorating your newly installed shelves with flair:
- Balanced Items: Select items that complement the room’s decor, making sure they don’t exceed the shelf’s weight capacity.
- Aesthetic Arrangement: Pay attention to the height and spacing of items for visual appeal.
- Decorative Elements: Consider adding books, dishware, or souvenirs to enhance the shelf’s design.
- Organizational Tidy: Keep shelves organized and clutter-free to maintain a stylish, put-together appearance.
These strategic final checks and meticulous decorating efforts will guarantee your shelves aren’t only stable but also visually stunning.
Frequently Asked Questions
How Do I Maintain the Shelves to Ensure Longevity?
A stitch in time saves nine; regularly dust your shelves with a soft cloth, inspect for instability, tighten screws, and apply wax oil every three months. Confirm they’re level and free from moisture to maximize longevity.
What Safety Precautions Should I Take During Installation?
Guarantee wall stability by using studs or anchors, locate hidden pipes or wires with a digital detector, and verify correct bracket placement. Measure accurately, wear safety gear, and double-check all connections to prevent accidents during installation.
Can I Install Shelves in a Rented Apartment Without Damage?
Yes, you can install shelves without damage. Use Command Strips for lightweight shelves, ensuring they hold up to 16 pounds. Clean surfaces with rubbing alcohol first. Follow instructions meticulously to maintain wall integrity while securely mounting shelves.
Are Floating Shelves Suitable for All Wall Types?
You’ll find floating shelves are suitable with caution. On wall studs, they’re strongest. For drywall or plaster, use precise stud location, anchors, and avoid over-tightening. Always consult the shelf’s installation guidelines to guarantee compatibility and stability.
How Can I Remove Shelves Without Damaging the Wall?
Begin by scoring caulk and paint with a razor knife. Carefully apply pressure to remove the shelf brackets. Use a drill for screws and fill holes with spackling compound. Ascertain minimal damage by holding the shelf flat.