Picture the brilliant flash of an arc illuminating metal as it fuses together—that’s the moment you’ll transform from observer to creator. Starting your welding journey isn’t just about striking an arc; it’s about mastering a craft that demands respect, proper preparation, and the right foundation. You’ll need more than enthusiasm to succeed, and the difference between a safe, productive workshop and a dangerous disaster lies in the choices you make before you even plug in your first machine.
Essential Safety Equipment for New Welders
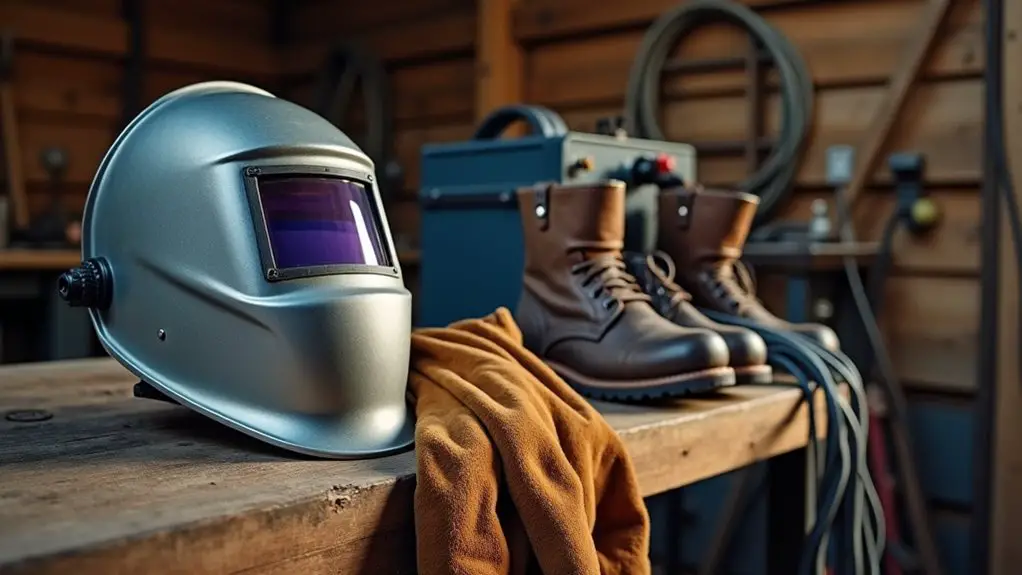
Before you strike your first arc, you’ll need to invest in proper safety equipment that protects every part of your body from welding’s inherent dangers.
Your welding helmet is your most critical piece—it shields your eyes and face from harmful UV/IR radiation while providing clear vision of your work. Don’t forget safety glasses underneath for extra protection.
Your welding helmet shields eyes and face from dangerous UV/IR radiation while maintaining clear vision of your work area.
You’ll also need flame-retardant clothing including a welding jacket and pants made from natural fibers.
Synthetic materials will melt to your skin. Heat-resistant gloves are essential—they reduce hand injuries by up to 60%.
Steel-toe boots protect your feet from falling metal and sparks.
Finally, invest in a quality respirator to protect your lungs from toxic fumes, especially when working indoors. Following proper OSHA requirements ensures you’re creating a legally compliant and safe working environment from day one.
Choosing Your First Welding Machine

With your safety gear sorted, you’ll need to select a welding machine that matches your skill level and project goals.
As a beginner joining the welding community, you’ll want something reliable yet forgiving while you develop your skills.
Here are four key factors to evaluate when choosing your first welder:
- Start with MIG welding – It’s the most beginner-friendly method, offering speed and ease of use for various projects.
- Reflect on adjustable power output – This flexibility lets you work with different metal thicknesses as your skills grow.
- Prioritize reputable brands – Hobart and Lincoln Electric offer excellent customer support and reliability for newcomers.
- Balance budget with features – Entry-level machines like the Hobart Handler 140 provide quality without breaking the bank.
Remember that no single process suits all applications, so understanding your specific welding needs will help guide your equipment choice as you advance in your welding journey.
Must-Have Tools for Any Welding Workshop

Once you’ve selected your welding machine, building a well-equipped workshop becomes your next priority for developing consistent, quality welds.
A properly equipped workshop forms the foundation for achieving professional-level welding results and consistent quality in every project.
You’ll need essential safety gear first: a welding helmet, protective gloves, and a welding jacket to shield yourself from sparks and UV radiation. Don’t forget safety glasses and ear protection.
Your tool arsenal should include welding pliers for wire cutting, clamps to secure workpieces, and a steel wire brush for surface preparation. A chipping hammer removes slag while an angle grinder handles cutting and grinding tasks.
Welding magnets help position ferrous metals at precise angles.
For workspace organization, invest in a sturdy welding table, proper work lighting, and reliable toolboxes. A fire extinguisher classified for flammable materials should be easily accessible in your workshop area for immediate response to potential welding fires.
These foundational tools will support your welding journey and help you join the community of skilled craftspeople.
Preparing Your Metal and Workspace
Even the most expensive welding equipment won’t deliver quality results if you’re working with dirty metal or operating in an unprepared workspace.
Setting yourself up for success means taking these preparation steps seriously—every experienced welder knows this foundation makes all the difference.
Your metal preparation and workspace setup should include:
- Clean and prep your metal – Remove all dirt, rust, and grease, then smooth any sharp edges through deburring.
- Mark and clamp everything – Use markers to show weld locations and secure pieces with clamps for proper alignment.
- Ensure proper ventilation – Good airflow removes dangerous fumes and keeps you breathing safely. Understanding your welding process beforehand helps you anticipate the specific ventilation needs for your chosen method.
- Clear your workspace – Remove clutter, add sufficient lighting, and keep a fire extinguisher within reach.
Setting Up a Safe and Efficient Welding Area
Creating a welding area that protects both you and your surroundings requires careful attention to layout, safety measures, and organization. Start with a solid cement floor or fire-resistant surface to prevent sparks from causing damage.
You’ll want to position your workspace near windows or exhaust fans for proper ventilation—this removes harmful fumes that can accumulate quickly. Set up welding curtains around your area to protect others from arc flash and flying spatter.
Keep a fire extinguisher rated for electrical fires within easy reach, and maintain a clutter-free zone around your welding table. Install clear safety signage indicating required PPE, and organize your tools on labeled shelves or pegboards for quick access during projects. Position your welder close to power outlets to avoid relying on long electrical cables that can create hazards and reduce performance.
Understanding Different Welding Methods for Beginners
Welding methods differ markedly in their techniques, equipment requirements, and learning curves, making your choice of starting point essential to your success as a beginner.
You’ll want to understand which process aligns with your goals and skill development timeline.
Here are the four main welding methods you should consider:
- MIG Welding (GMAW) – Your most beginner-friendly option with automatic wire feeding and clean results on steel, aluminum, and stainless steel.
- TIG Welding – Offers precise control for detailed work but requires advanced coordination and practice.
- Stick Welding (SMAW) – Portable and inexpensive, perfect for outdoor repairs but demands more cleanup and skill.
- Flux-Cored Welding (FCAW) – Self-shielding capability makes it ideal for windy conditions and dirty materials.
MIG welding stands out because it employs a wire electrode from a spool for consistent heat generation, making the process faster and more reliable for beginners tackling their first projects.
Proper Techniques for Your First Welds
The foundation of successful welding lies in mastering your body positioning and electrode control before you strike your first arc.
Master your stance and electrode technique first—everything else in welding builds from this fundamental foundation.
You’ll want to maintain a consistent angle and distance from your workpiece—this consistency separates good welders from frustrated beginners.
Start with simple electrode movements like “stacking dimes” to evenly distribute your melt pool across the weld area.
For MIG welding, use a gentle push-pull motion to maintain penetration and bead quality.
TIG requires more finesse—you’ll need precise torch and filler rod control for smooth results. Remember that TIG welding includes a foot pedal to adjust current and heat applied to the metal, giving you real-time control over your weld quality.
Focus on keeping your arc stable and consistent to prevent uneven heating. Don’t rush the process; developing muscle memory takes practice, but you’re building skills that’ll serve you throughout your welding journey.
Easy Starter Projects to Build Your Skills
Five simple projects will transform your welding practice from random practice beads into functional items you’ll actually use around your home.
These beginner-friendly builds teach essential skills while creating practical pieces that prove your growing abilities.
Start with projects that match your current skill level and gradually increase complexity:
- Wall-mounted key holder – Perfect your tack welds and measurement accuracy while creating something you’ll use daily.
- Simple metal box – Master corner joints and heat control to prevent distortion in this foundational project.
- Steel wall planter – Practice welding thin metal frames while adding aesthetic value to your living space.
- Coat hooks and hangers – Quick confidence boosters that emphasize proper shaping and finishing techniques.
Each project builds specific skills while producing items that showcase your welding journey to friends and family. These home décor projects combine functionality with decorative elements that enhance your living spaces with personality.
Common Beginner Mistakes and How to Avoid Them
Building those first projects will boost your confidence, but you’ll learn faster by recognizing the pitfalls that trip up most new welders.
You’re not alone if you’ve struggled with poor metal preparation—failing to remove rust, paint, or grease leads to weak, contaminated welds.
Don’t skip the cleaning step, even when you’re keen to start welding.
Heat control trips up many beginners. Inconsistent temperatures cause burn-through or lack of penetration.
Practice maintaining steady heat and proper voltage settings.
Safety oversights are common but dangerous. Always wear your helmet, gloves, and protective clothing.
Guarantee adequate ventilation and keep fire extinguishers nearby. Even seemingly minor details like loose boot laces can create serious hazards in busy welding environments.
Finally, don’t rush electrode or filler material selection.
Using the wrong materials compromises weld quality and safety.
Take time to match materials properly.
Maintaining Your Welding Equipment and Tools
Your welding equipment represents a significant investment that’ll serve you well with proper care and maintenance.
Protect your welding investment through consistent care—proper maintenance transforms expensive equipment into reliable, long-lasting tools for professional results.
As you join the welding community, developing good maintenance habits early will keep your gear running smoothly and extend its lifespan.
Here’s your essential maintenance routine:
- Daily checks – Calibrate your weld head and verify shield gas settings before each session.
- Weekly inspections – Examine cables and hoses for cracks, wear, or damage that could affect performance.
- Monthly cleaning – Remove debris from inside your machine and clean away grime buildup.
- Quarterly maintenance – Replace worn consumables like nozzles, tips, and tungsten electrodes.
You’ll also want to inspect electrode holders, maintain proper wire supply, and check that cooling fans spin freely.
A well-planned maintenance schedule significantly reduces your operational costs by preventing equipment failures and the need for costly repairs.
Following these practices keeps you welding safely and professionally.
Frequently Asked Questions
How Much Does It Cost to Get Started With Welding?
You’ll need around $500-800 to start welding with basic equipment and safety gear. This covers an entry-level MIG welder, helmet, gloves, and consumables. You can upgrade later as your skills develop.
Do I Need a License or Certification to Weld?
You don’t need a license for basic welding, but you’ll want AWS certification to join the welding community professionally. It’s performance-based, widely recognized, and opens doors to better opportunities and career advancement.
Can I Learn Welding on My Own or Do I Need Classes?
You can absolutely learn welding on your own with proper resources and safety equipment, but formal classes will accelerate your progress and help you avoid developing bad habits early.
How Long Does It Take to Become Proficient at Welding?
You’ll gain basic welding skills in 1-6 months depending on technique, but becoming truly proficient takes 3-4 years through apprenticeships. Your learning pace, practice consistency, and mentorship access greatly impact how quickly you’ll master welding.
What Type of Metal Should Beginners Practice Welding on First?
You’ll want to start with mild steel since it’s forgiving, affordable, and widely available. Choose pieces thicker than 3mm to avoid burn-through. Once you’ve mastered mild steel, you can progress to aluminum and stainless steel.