
What Kind of Floor Goes Under a Bathtub?
Understanding the layout and structure of your bathroom will help you maintain and repair it. Some of the most commonly asked questions about bathroom renovations and maintenance are about their flooring. For instance, what kind of floor goes under a bathtub?
The kind of flooring that goes under a bathtub includes tiling, wood, cement, or laminate. Under that, you’ll find the subfloor which is made with plywood. Beneath the plywood is an arrangement of floor joists that will support the flooring and the bathtub on top of the floor.
This article explores everything you need to know about the floor under your bathtub. It takes you through a step-by-step process of installing flooring under your bathtub. It also considers how to prevent your bathroom floor from getting damaged by water.
Flooring Under a Bathtub
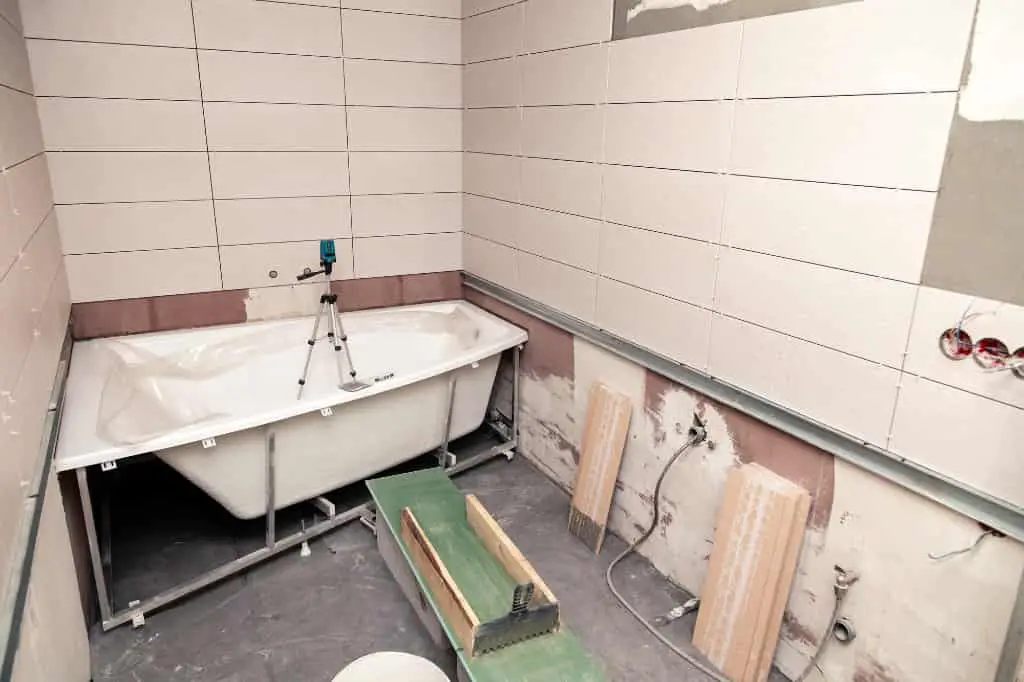
Whether you have a built-in bathtub or standing claw tub, the floor under your bathtub will be a subfloor made with plywood. Under the plywood will be a concrete backer board, followed by floor joists placed on top of subfloor bearers. You can place a variety of different types of flooring over the subfloor.
Steps to Installing Flooring Under a Bathtub
To better understand what kind of flooring goes under a bathtub, we’ve outlined the installation steps below:
1. Install Subfloor Bearers
Subfloor bearers are installed to support floor joists. They can be made of wood or steel, but it is essential that they can carry a lot of weight. When installing subfloor bearers, renovators often leave gaps between them to allow for better ventilation.
2. Lay Down the Floor Joists
Floor joists are typically the foundation of the whole bathroom. Before preparing a space for a bathtub, renovators make sure the floor joists are laid down properly. This will include ensuring that:
- They are made of high-quality timber or steel.
- They have enough space between them. Depending on the structure that’s being placed over them, floor joists either have spaces between them or are in a continuous span. It’s highly recommended that novices consult with a builder for recommendations on how to install floor joists.
- They are laid so that their surfaces are all at the same level. This is important as a level layer of floor joists will ensure that the floor above it is level.
3. Lay Down the Subfloor
Once the floor joists are laid, it is time to put down the subfloor. Plywood is by far the most popular material used for subfloors because it’s both cheap and durable. Here are some of the advantages of using plywood as a subfloor:
- It can survive being exposed to high levels of humidity. High-quality plywood such as CDX plywood is particularly resistant to moisture and mold.
- It is inexpensive. Plywood is affordable, making it an excellent way to cut down on costs when renovating a bathroom.
- It can support a variety of flooring materials. As plywood is sturdy, it can bear the weight of various materials, including hardwood, bamboo, cement, and porcelain.
Other subfloor materials include concrete, and particle board. Renovators tend to choose the sub floor based on the type of flooring that they’ll install over it.
4. Lay Down the Concrete Backer Board
Once the subfloor is installed, tiles will be placed directly over it to complete the floor. However, many renovators add a concrete backer board layer over the subfloor in a bathroom. This protects the subfloor and plywood from long-term water damage.
A concrete or cement backer board is a prefabricated panel with cement, water, silicone, and other reinforcing materials. It can be easily laid down and acts as a layer of protection for the subfloor.
Laying down the concrete backer board is relatively simple. Here are the steps that most builders, renovators, and DIYers use:
- Cut the boards down to the correct size.
- Apply a layer of mortar. Mortar is applied to ensure that the backer board adheres to the surface that’s being laid.
- Place the cement tiles down, leaving a little space between each.
- Gently press the cement boards down into the mortar.
- Use the screws that will come with the board to fix the boards on the floor.


5. Lay Down Tile or Concrete
Once the concrete backer board layer is complete, it’s time to put down the final layer of the bathroom floor. Depending on the aesthetic the homeowner is going for, this could involve putting down tiles, laminate, or other types of flooring.
Here are some of the most popular types of flooring for bathrooms:
- Laminate flooring: Laminate, made with plastic and resin, is an excellent choice for bathrooms as it is durable and water-resistant. However, it is hard to install; when choosing laminate, make sure you consult with a builder.
- Ceramic tile: Ceramic tile is one of the most popular types of bathroom flooring. It is water-resistant and comes in a variety of patterns and variants.
- Stone: Natural stone flooring will give the bathroom a luxurious, timeless look. Stone flooring can add to a house’s overall value.
- Concrete: Concrete is a stylish bathroom flooring choice and is great for a sleek, minimalist aesthetic. However, concrete is challenging to install and can be pretty expensive to replace. When using concrete, consult with a professional.
- Hardwood: Hardwood makes for a beautiful bathroom as it gives the space an elegant aesthetic. However, it is not ideal for spaces with lots of moisture as it absorbs water and may expand or develop mold. If a builder uses hardwood, they must make sure that it is thoroughly waterproofed.
6. Install the Bathtub
Once the floor is ready, it’s time to install the bathtub. To install a tub, builders first ensure that it is connected to the drainage and that you correctly install dry-fit tubes. Making sure everything is connected correctly will ensure that the flow of water doesn’t impact the bathroom.
If you’re designing your bathroom yourself, you should consult with a builder for advice on flooring. A builder will help you understand what type of flooring you should choose and how best to lay down your subfloor. A builder will also give you the manpower support you need to install your bathroom floor and bathtub.
A lot of effort goes into installing your bathroom floor. It can be a time-consuming and costly process, so you must try to protect your bathroom floor from damage.
How Do You Protect Your Bathroom Floor From Water Damage?
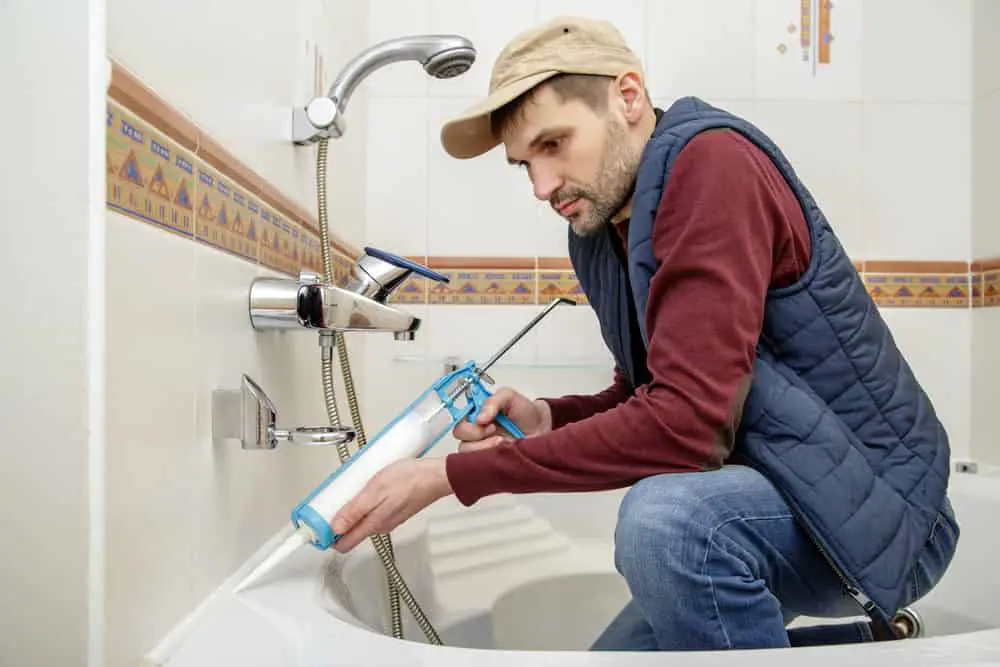
Protect your bathroom floor from water damage by using shower liners and bathroom mats to prevent water from seeping down to the subfloor. Ensure that the bathroom has adequate ventilation to avoid moisture buildup. Finally, thoroughly waterproof the bathroom.
Protecting the surface of your bathroom floor will also protect your bathroom’s subfloor and the layers underneath it. This will ensure your bathroom fit-out will last longer. Here’s how to protect your bathroom floor:
- Use shower and bathroom accessories. Bathroom accessories like shower curtains, bathroom mats, and bathroom slippers aren’t just aesthetic. They prevent water from ending up on your bathroom floor and then seeping down into the subfloor.
- Make sure your bathroom has plenty of ventilation. If you have a fan in your bathroom, turn it on after using your bathtub. If you don’t have a fan, make sure that the windows are left open. This will prevent moisture from building up in your bathroom.
- Waterproof your bathroom. You can waterproof your bathroom with a silicone protectant or with a general waterproofing agent.
Conclusion
You can have several types of flooring under your bathtub, depending on your bathroom’s aesthetic. You may choose from tiling, laminate, concrete, or wood. Under this flooring are the bathroom’s subfloor and the floor joists. These provide support to the top level of flooring and ensure your bathroom doesn’t suffer from water damage.