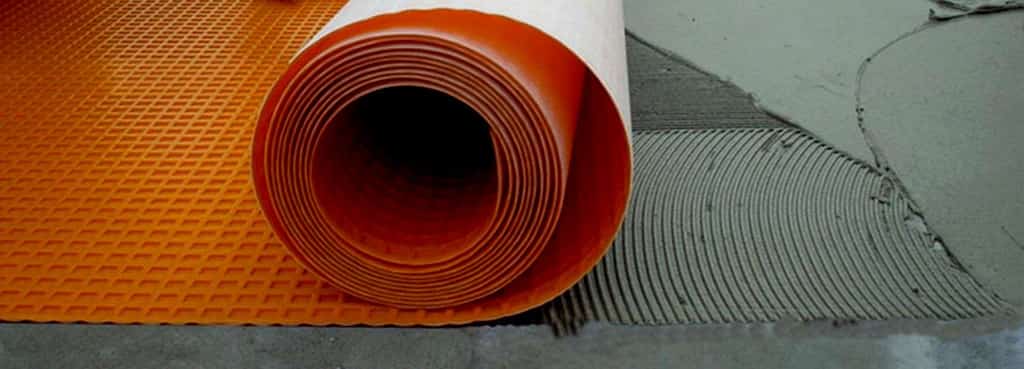
Ditra has grown popular over the years. You have probably seen these orange waffle-y products on television and DIY YouTube Videos. So, if you’re going into construction or remodeling, you could be wondering, “Do you need to use Ditra over concrete?”
Ditra is needed over concrete, especially if there is movement in the cement. Ditra gives you peace of mind as it is used to uncouple the tiles from the concrete and prevents the tiles from cracking by allowing them to move independently when a home shifts.
The rest of this article will give a detailed outline regarding why you should use Ditra over concrete, the benefits of using Ditra, and installation tips.
Benefits of Using Ditra Over Concrete
Stone and ceramic tiles are easy to maintain, hygienic, create ideal surface coverage, and are durable. Traditional installation methods such as using sand and mud beds with chicken wire to uncouple tiles from the concrete make it challenging to install hard surface coverings. Ditra performs multiple underlayment functions that protect stone or ceramic tile assembly over any load-bearing or even substrate.
Some of the functions that make it beneficial to use Ditra over concrete include:
Uncoupling
To install tiles successfully, an uncoupling membrane or forgiving sheer interface is required. Ditra acts as an uncoupling membrane, a tool used to separate the tile assembly from the substrate (concrete). The membrane neutralizes your tiles’ stresses and differential movement through its open rib structure, thus preventing cracking.
In simple terms, when there is a shift in your house, Ditra, which acts as a subfloor, absorbs and adjusts the movement instead of your tiles.
Acts as a Waterproofing Membrane
Ditra is especially popular when installing tiles in the bathroom because it provides waterproofing in exterior and interior applications. In today’s building environment, many substrates are sensitive to moisture, including concrete. Moisture sensitive substrates contract and expand, causing the tiles to crack.
Here is a video on how to install a bathroom floor using Ditra:
When your tiles are exposed to moisture, the setting materials become loose, causing your tiles to lift. Another obvious and huge downfall of moisture penetration is mold. Ditra is thinner than traditional layers and prevents penetration of moisture because of its polythene composition.
Vapor Management
One of Ditra’s distinguishing features is its ability to provide free space on the lower side of the matting through the configured channels. The existence of free space allows excess vapor and moisture to escape. Ditra thus manages moisture underneath the tiles effectively, without compromising it.
Load Distribution
Ditra installations, like pillars or columns erected on solid foundations, can support heavy loads. On the matting cutback cavities, there exist column-like cement configurations. Ditra supports the tile layer by evenly distributing weight and transferring the load to the substrate. Ditra is incompressible even with tile assembly, meaning it achieves uncoupling advantages without sacrificing its load distribution capabilities.
The ability to maintain tile surface integrity while distributing and supporting heavy loads has been established through extensive applications like exposure to vehicular traffic, field, and laboratory tests.
Adhesive Properties
Ditra attains good adhesion when tiles are layered to the substrate and can, therefore, be used for both floor and wall coverings. When necessary, you can use anchor plugs with wall coverings. Adhesion is achieved due to the bonding of the fleece matting into the thin-bed cement found beneath and its mechanical anchoring in the cutback cavities.
Other than the five beneficial functions of using Ditra, it also has other advantages like:
- It requires minimal labor to install
- No fasteners are needed
- It is lightweight
- Easy to transport and store
- You get a full labor warranty
- You don’t have to wait for it to cure before assembling the tiles
Installation of Ditra Over Concrete
If you’re looking to DIY remodel a part of your home using Ditra, you can use the following steps to make it successful:
- Compile the necessary tools. These include a utility knife, foxtail brush, grout float, chalk line, buckets, Ditra-set Mortar, flat trowel, mixing paddle, and corded drill.
- Flatten the subfloor. Ensure that the concrete slab is flattened using the mortar to eliminate any low or high places to avoid bumps.
- Clean the floor’s surface. Before installation of Ditra, use foxtail brushes to clean the surface and if there is an excess mortar that seeps beneath the drywall, scrape it off.
- Measure the dimensions accurately. Using a tape measure, measure the room’s dimensions to install Ditra, then lay it out, mark the spread lines with a pen or chalk along every joint and cut it accurately using a utility knife. Laying out and pre-cutting the entire Ditra gives it time to flatten out fast. Cut around the threshold, support posts, and door jambs from the backside to make it easy.
- Mix the Ditra-Set mortar. Use a mixing attachment and electric drill to mix the mortar in a bucket. Follow the instructions indicated on the package to determine how much water you should use. Let the thin-set slake, that is, leave it undisturbed for the water to penetrate all dry ingredients completely.
- Spread the mortar. Apply the mortar directly on the concrete using a V-notch trowel and make sure to follow the spread lines. Spread it over half sections; spreading too much of it at once will have other parts dry out quickly, making it difficult to line up the Ditra. Spread it evenly to prevent the occurrence of lumps.
- Roll out Ditra. Once the mortar is dry, roll out your Ditra and place it on the mortar with the square, orange pattern facing up and the felt side on the bottom. Place adjacent pieces against one another and be careful to prevent overlapping them as this will create a height difference.
- Embed Ditra. Once it is in place; firmly smoothen Ditra out using a trowel to push it into the mortar to prevent high spots and lumps. Pay extra attention around the edges and ensure there is complete contact between the mortar and fleece matting. Begin smoothening it out using the grout float from the mid-section to press wrinkles and stretch it outward.
- Mix more mortar and fill cavities around the Ditra. Allow the mortar to slake for about 15 minutes before you fill the cutback cavities. Use a trowel and fill all the spaces to avoid having ridges on its surface. You can walk on the Ditra; you don’t have to wait for it to cure, and then place tiles.
Laying Tiles on Ditra
Before you commence tiling over Ditra, ensure you read instructions given by the manufacturer and get the essential tools. As long as Ditra is installed properly and according to the manufacturer’s guide, it will provide an ideal surface to lay your tiles. Use the following tips to achieve a successful installation:
- Use an unmodified thin-set instead of a modified thin-set. Unmodified thin-set allows you to lay your tile without waiting for it to cure immediately. If you’re doing it yourself and need to save on time, this is an ideal choice. Modified thin-set requires air for it to cure.
- Cut and arrange your tiles. To achieve your desired outlook, cut the tiles evenly if they are not pre-cut, and arrange them according to the pattern of your choice.
- Clean the grout joints as you tile. Thin-set are difficult to clean when dry. You will save time if you clean it as you go.
Bottom Line
You can install tiles directly over concrete, but problems will soon start to erupt. Concrete is susceptible to cracking when exposed to water, and it responds poorly to shifts in the foundation. To lengthen the duration of your tiles, use Ditra as an uncoupling membrane. Besides the uncoupling function, Ditra has waterproofing, vapor-management, load-distribution, and adhesive properties.
Ensure to follow instructions during installation, especially if you’re carrying out a DIY installation. Installing Ditra requires minimal labor because it is lightweight, and when you use an unmodified thin-set, you don’t have to wait for it to cure before assembling your tiles.