Putting up a gazebo on your deck may seem like a daunting task; however, if you opt for a DIY gazebo, things are more straightforward than they appear, especially if you opt to purchase and install a very common and popular pavilion-style gazebo.
To put up a gazebo on your deck, you will need to follow the instructions that come with your gazebo, which may vary slightly. The most popular gazebo is the Yardistry 12 x 14 with an aluminum roof.The instructions for this gazebo are simple enough that the understanding of putting it up can be applied to almost any gazebo.
We will briefly cover the different styles of gazebos that you could choose to build; however, this article will cover putting up a DIY gazebo that is the most popular and most common one that millions of people choose to use on their decks.
Types of gazebos
There are a few various types of gazebos, and we will just briefly cover them here so you can understand what your options would be in deciding which gazebo you would want to choose to have on your deck.
Do take note that this article will only cover the most popular type of gazebo installation, which comes from Yardistry, which makes a variety of the most popular DIY gazebos.
Folly gazebo
A folly gazebo is a type of gazebo used for ornamental purposes only. That means they are built and set up in a way that they are not meant to be explicitly used by people. They are intended to be viewed from afar and would fit in with part of the scenery. These gazebos are usually constructed with metal frames and have no roof enclosures.
Rotunda gazebo
A rotunda gazebo is a circular style of gazebo consisting of a circular dome roof. This style of gazebo originated in Europe with the rotunda style of architecture has also been incorporated into some of their other building constructions.
Pagoda gazebo
The pagoda gazebo originated in Japan and is typically made from wood and is used for religious purposes. These gazebos have astonishing and beautiful designs and are also meant to be ornamental; however, unlike folly gazebos, people do use them, as we have stated.
The designs of these gazebos may have roofs that include three or more tiers, and Included as well in their intricate design are intricate carvings in the woodwork.
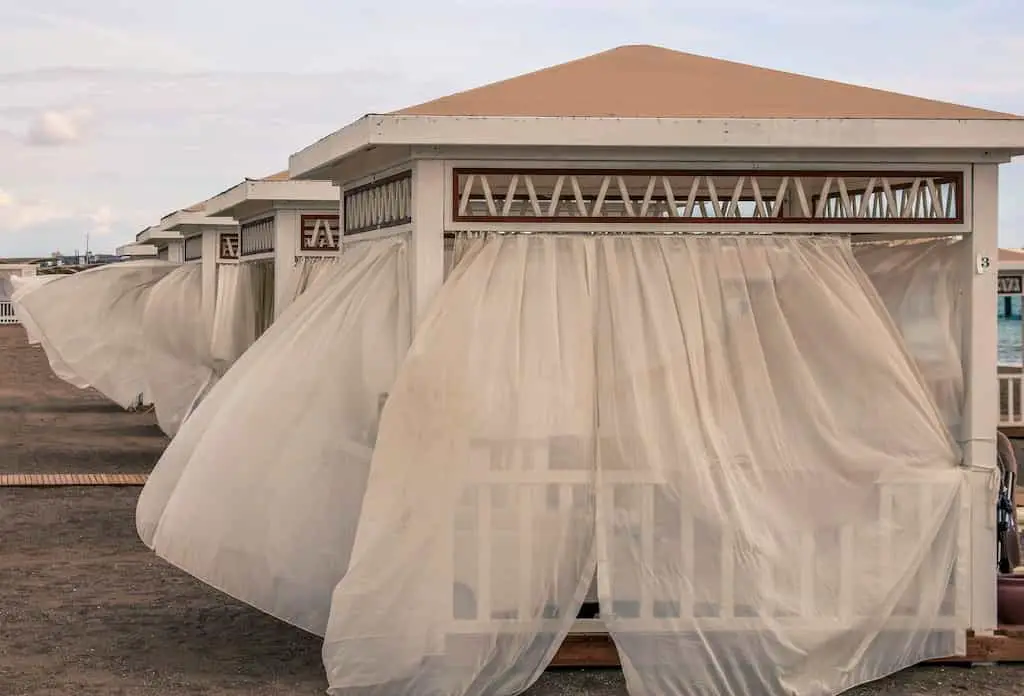
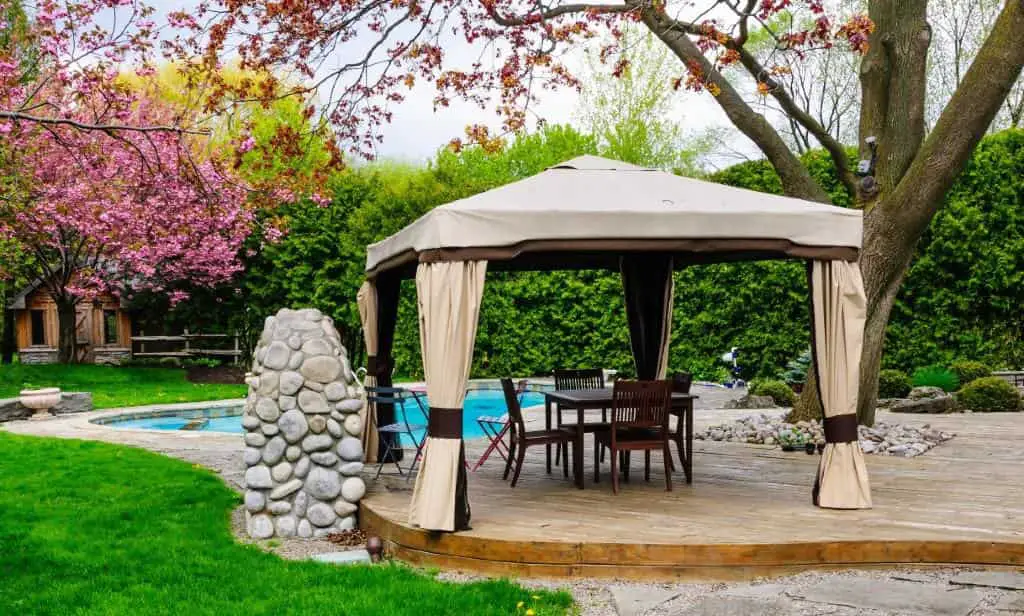
Pavilion gazebo
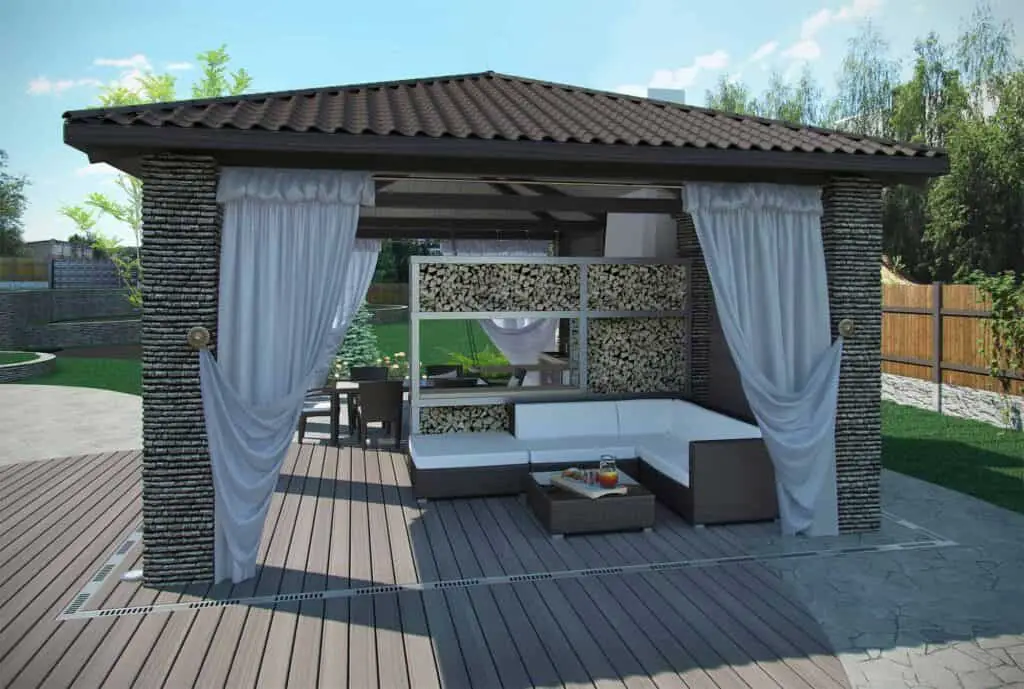
A pavilion-style gazebo is probably the most typical style of gazebo one would find, especially in western culture. It is an open style of a gazebo, usually rectangular in design, and is structured on as many columns as necessary.
These types of gazebos are typically situated close to other buildings and are used with the intent for gatherings, events, and parties (this is the type of gazebo we will be giving a tutorial on in this article).
Pergola gazebo
The last style of a gazebo is that of a pergola, and this style is built so that its framework will support climbing plants. The style is simple with an open or closed featured roof, and the framework is basic, consisting of sturdy pillars. Also functional and beautiful, this gazebo can be used for events, gatherings, and parties and is also typically large in scale.
How to put a gazebo on a deck
This section will fully detail how to set up a DIY gazebo that you have purchased and would like to install on your deck. Before diving right into the tutorial, there are a few things we need to consider.
What type of gazebo are you looking to put up?
You can purchase many gazebos, with some even being portable, designed for camping purposes, consisting of aluminum poles, a material roofing, and being lightweight. This article will not cover those types of portable camping gazebos due to the fact that they are not really meant to be put on decks and left there indefinitely.
Besides the fact that they are meant to be used for camping purposes, the setup of these portable gazebos is very straightforward and usually takes approximately 5 minutes to set up.
The most popular type of gazebo that many people tend to purchase and put on their deck is the Yardistry 12 x 14 With Aluminum Roof, and this is the one that we will cover in this article.
Check out this gazebo on Amazon here
We will go over the installation and then all the tips and tricks you should consider that are not in the manual that is designed for its installation. Additionally, Yardistry offers other styles of gazebos which are also relatively popular and have a similar setup.
Due to that fact, you can use this article and the tips it provides to set up almost any gazebo that Yardistry has to offer.
Check out these other types of Yardistry gazebos on Amazon here
Step-by-step guide for putting up a gazebo
This section will detail how to put up a gazebo on your deck but first, let’s take a look at any requirements or preparation that you may need in order to fulfill this installation successfully.
Furthermore, we will give you a condensed detailed guide that we have taken from the actual installation and operating instructions and then from Yardistry’s various tips and tricks videos that help with the problematic installation areas.
Can a gazebo go on a deck?
In fact, a gazebo can go on a deck, especially if it is a DIY gazebo, and as we will see, the instructions are specific to placing a gazebo on a deck, for our example and the most common.
However, one thing to consider is the weight of the gazebo, as with the Yardistry 12 x 14, it weighs a couple of hundred pounds, as will most gazebos. Your deck should be able to hold the weight of a gazebo as long as its strength to weight ratio exceeds the weight of the gazebo, so this is something to take into consideration. However, most decks should be fine for the most part because they are built to handle a sufficient amount of weight.
Considering your deckarea for the gazebo installation
The gazebo can be installed on almost any surface, and the operation manual details that you specifically need at least a minimum of 11 feet and 11 inches x 13 feet and 11 inches (11″ 11′ x 13″ 11′) of space for the gazebo installation with a clearance of 6 inches on all sides.
It is important to note that this gazebo and most other DIY pre-built gazebos do not come with any anchoring hardware, so you will need to purchase those supplies yourself.
Anchoring hardware
You will need a total of 16 anchoring hardware bolts that will mount the gazebo to your deck. The gazebo mounting post includes holes for securing your gazebo to your deck, and the diameter of the holes for the gazebo mounting post ar 1/2″ in diameter, but the depth you will have to obtain from your deck.
It must be noted that every deck might be slightly different with regards to the width of the wood flooring, so you would need to inspect and determine what size bolts you would need for the installation.
The tools you will need for the installation
- Tape measure
- Carpenters level
- Standard or cordless drill
- Claw hammer
- 7/16″ and 9/16″ wrench
- 8′ Step ladder
- Safety glasses
- Adult helper
- Safety gloves
- Hard hat
- 6′ step ladder (two of them)
- Square
- Rachet
- 7/16, 1/2, and 9/16 socket
Helpful tips for installation
- Work on a raised solid and flat surface such as a sawhorse or table
- Keep all connections and point flush where shown in the instructions and wherever possible
- When assembling beams, keep parts flat, straight, and level.
Step-by-step guide for putting up a gazebo: step 1
Step one is for you to inventory all your hardware. This includes the tools you will need and then going through the gazebo hardware, wood and accessories to make sure everything is all there. To do so, you will search for the item labeled in the parts identification sheets.
If there are any parts missing or any damaged parts, you will either need to take the gazebo back to the store or contact the Yardistry support team.
Next, you should read the assembly manual entirely and pay attention to any sections concerning ANSI warnings and the safety and maintenance pages. Also, before you discard the cartons, you should fill out the product number carton I.D stamp because if you ever intended to contact customer relations, you will need this information.
Step-by-step guide for putting up a gazebo: step 2 (pillar assembly)
This is where you will assemble the posts that will hold up the roof of the gazebo. For this part of the construction, you will be required to join the posts together and then fasten the brackets and mount them at the bottom of each post.
The plinths, brackets, and mounts are fairly straightforward to install and screw in at the bottom of the 6 x 9 posts, and this should not require much effort.
The exact parts for step 2 that you will require are;
- 4 x (453) 6 x 9 Post 152.4 x 228.6 x 2387.6 mm (6 x 9 x 94”)
- 8 x (459) Plinth 23.8 x 133.4 x 200 mm (5/4 x 6 x 7-7/8”)
- 8 x (460) Plinth Long 23.8 x 133.4 x 276.2 mm (5/4 x 6 x 10-7/8”)
- 16 x #8 x 2-1/2” Wood Screw
- 64 x #8 x 1-1/2” Wood Screw
- 16 x #10 x 1-1/4” Pan Screw
- 8 x Post Mount
- 16 x 5/16” T-Nut
- 16 x 5/16 x 1-1/2” Hex Bolt (with 5/16” lock washer, 1/4 – 5/16” large washer)
Take note that to make things eaiser you can hammer in the T-Nuts into the beams instead of trying to push them in with your hands.
Step-by-step guide for putting up a gazebo: step 3 (short beam assembly)
Working on a flat surface like a table will help with the alignment of the beams in step 3. To make sure that the beams are flush and straight, have one person look down the beam assembly. The other person will then tighten the wafer bolts securing the assembly.
When attaching the beam end short assembly to the beam end assembly in the following part, what you should do Is to place a 3/8′ bolt through one hole for the guest at each end. You should then align miters so they are flush at one end and then install the screw closest to the miter. You should then repeat this process at the other end.
If, however, the miter at the second end is not flush, loosen the four wafer bolts on the beam short assembly. Then adjust to make flush and install the screw closest to the miter. You should then go back and re-tighten the wafer bolts. Remember, it is most important to keep the ends flush for easy installation.
The exact parts you will need for step 3 are;
- 4 x (449) Beam Short End 38.1 x 139.7 x 558.6 mm (1-1/2 x 5-1/2 x 22”)
- 2 x (450) Beam Short Centre 38.1 x 139.7 x 2422.1 mm (1-1/2 x 5-1/2 x 95-3/8”)
- 2 x (451) Beam Short Left 38.1 x 139.7 x 1769.7 mm (1-1/2 x 5-1/2 x 69-11/16”)
- 2 x (452) Beam Short Right 38.1 x 139.7 x 1769.7 mm (1-1/2 x 5-1/2 x 69-11/16”)
- 12 x 5/16 x 1-1/2” Hex Bolt (5/16” lock washer, 1/4-5/16” large washer, 5/16” t-nut)
- 36 x #8 x 2-1/2” Wood Screw
Step-by-step guide for putting up a gazebo: steps4, 5 and 6
It would help if you referenced the color insert that was supplied with your gazebo, paying special attention to the measurements throughout the next two steps. This is because all measurements must be accurate for all future alignment of the assembly from this point onwards.
When attaching the beam assemblies to the post assemblies, make sure the corner of the beam assemblies are flush before tightening the 3/8’x 10 1/2 ‘hex bolts. Once the beam assemblies are attached to the post assemblies in step 5, part 1make sure these following measurements are met before securing the beam assemblies to the post assemblies and anchoring the gazebo to your deck;
- 13′ 11″ diagonally between the posts
- 11′ from outside to outside of adjacent posts
- Each post assembly is square to the beam assembly
- Each post assembly is level
- Each beam assembly is level
It would help if you had four individuals to help with the adjustments in this step. As you are attaching the gussets in step 6 make sure to remeasure, level, and square all parts that need to be and adjust anything if necessary to make sure that all the measurements on the color insert that came with the gazebo are matched.
The exact parts you will need for these three steps are;
- 4 x (445) Beam Long End 38.1 x 139.7 x 780.6 mm (1-1/2 x 5-1/2 x 30-3/4”)
- 2 x (446) Beam Long Centre 38.1 x 139.7 x 2587.5 mm (1-1/2 x 5-1/2 x 101-7/8”)
- 2 x (447) Beam Long Left 38.1 x 139.7 x 2074.4 mm (1-1/2 x 5-1/2 x 81-11/16”)
- 2 x (448) Beam Long Right 38.1 x 139.7 x 2074.4 mm (1-1/2 x 5-1/2 x 81-11/16”)
- 8 x 5/16 x 1-1/2” Hex Bolt (5/16” lock washer, 1/4-5/16” large washer, 5/16” t-nut)
- 2 x Long Beam Insert
- 28 x #8 x 2-1/2” Wood Screw
- 12 x 5/16 x 3” Hex Bolt (5/16” lock washer, 1/4-5/16” large washer, 5/16” t-nut)
- 4 x 3/8 x 9-1/2” Hex Bolt (3/8” large washer x 2, 3/8” lock nut)
- 4 x 3/8 x 12-1/2” Hex Bolt (3/8” large washer x 2, 3/8” lock nut)
- 8 x 5/16 x 4-3/4” Lag Screw (1/4-5/16” large washer)
- 4 x (330) Gusset Right 38.1 x 190.5 x 1003.3 mm (1-1/2 x 7-1/2 x 39-1/2”)
- 4 x (331) Gusset Left 38.1 x 190.5 x 1003.3 mm (1-1/2 x 7-1/2 x 39-1/2”)
- 16 x 5/16 x 3” Lag Screw (1/4-5/16” large washer)
- 16 x 5/16 x 3-3/4” Hex Bolt (5/16” lock washer, 1/4-5/16” large washer, 5/16” t-nut)
- 8 x #10 x 1-1/4” Pan Screw
- 4 x Roof to Post Bracket
Step-by-step guide for putting up a gazebo: steps 7 and 8 (small roof rafter assembly)
Make sure to work on a solid, raised, and flat surface, as we have stated when assembling the fascia beam and roof rafter. In step 8, part 1 of the installation, it is critically important to make sure that all corners are flush. You should have one person hold the boards in place while another proceeds to install the wood screws and repeat this at every corner.
When attaching the rafter to the fascia beam assembly, make sure the rafter is centered to the two pilot holes before installing the wood screws. If the strap short and strap are not flush to the rafter corner left or rafter corner right in step 8, part 2, have someone to help that will hold the board in place while another installs the wood screws in place.
The exact parts you will need for steps 7 and 8 are;
- 2 x (443) Fascia Left 38.1 x 82.6 x 1853 mm (1-1/4 x 3-1/4 x 72-15/16”)
- 2 x (444) Fascia Right 38.1 x 82.6 x 1853 mm (1-1/4 x 3-1/4 x 72-15/16”)
- 2 x (435) Fascia Left – Large Roof 38.1 x 82.6 x 2157.7 mm (1-1/4 x 3-1/4 x 84-15/16”)
- 2 x (436) Fascia Right – Large Roof 38.1 x 82.6 x 2157.7 mm (1-1/4 x 3-1/4 x 84-15/16”)
- 4 x 5/16 x 1-1/2” Hex Bolt (5/16” lock washer, 1/4-5/16” large washer, 5/16” t-nut)
- 2 x (440) Rafter 31.8 x 76.2 x 1915.4 mm (1-1/4 x 3 x 75-3/8”)
- 20 x #8 x 2-1/4” Wood Screw 2 x (438) Rafter Corner Left 25.4 x 88.9 x 2601.9 mm (1 x 3-1/2 x 102-7/16”)
- 2 x (439) Rafter Corner Right 25.4 x 88.9 x 2601.9 mm (1 x 3-1/2 x 102-7/16”)
- 2 x (337) Strap Short 31.8 x 82.6 x 1561.3 mm (1-1/4 x 3-1/4 x 61-7/16”)
- 2 x (437) Strap 31.8 x 82.6 x 2603.5 mm (1-1/4 x 3-1/4 x 102-1/2”)
- 2 x (442) Rafter Short Right 31.8 x 76.2 x 1040.2 mm (1-1/4 x 3 x 40-15/16”)
- 2 x (441) Rafter Short Left 31.8 x 76.2 x 1040.2 mm (1-1/4 x 3 x 40-15/16”)
- 40 x #8 x 1-1/2” Wood Screw
- 8 x #8 x 2-1/4” Wood Screw
Step-by-step guide for putting up a gazebo: step 9
In this step you will attach the brackets that mount to the small roof rafter assembly. Take note to only install one small roof rafter assembly sue to the fact that the secnd will not have brackets. Two individuals are not necessary for this step and you will only need to install the beam brackets with screws mounting them to all the rafter beams (rafter left, right and rafter).
The exact parts you will need for this step are;
- 3 x #8 x 1” Pan Screw
- 3 x #12 x 1-1/2” Pan Screw
- 3 x Roof to Beam Bracket
Step-by-step guide for putting up a gazebo: step 10 (large roof rafter assembly)
The construction of the large roof rafters is almost identical to that of the small roof rafters. The fascia beam assembly will be exactly the same as that of the small roof rafter assembly, and always make sure to have the ends be flush.
The main difference is that the large roof rafter’s design is slightly different, with the middle section being that of a rectangle, while the smaller roof rafter is shaped like a triangle.
For the small rafter, you needed to connect the straps to the rafters, and you will do the same for the large roofs, except there will be one additional rafter taking into consideration the rectangular shape. Again work on a table and make sure to have all corners flush. Again, use two individuals (one to hold the rafters and straps in place and the other to install the screws.
Considering step 10, part 4, you will need to turn the large roof rafter over once you have attached the fascia beam assembly to the rafters and attached the straps to the rafters with the screws once again, making sure everything is flush.
After you have turned the roof assembly over, you will need to brace the large strap right and strap left together with the strap brace. This should be easy enough and will not require assistance.
The exact parts you will need for step 10 are;
- 4 x (440) Rafter 31.8 x 76.2 x 1915.4 mm (1-1/4 x 3 x 75-3/8”)
- 2 x (434) Top 31.8 x 93.8 x 577.9 mm (1-1/4 x 3-9/16 x 22-3/4”)
- 8 x #8 x 2-1/4” Wood Screw
- 8 x #8 x 2-1/2” Wood Screw
- 2 x (438) Rafter Corner Left 25.4 x 88.9 x 2601.9 mm (1 x 3-1/2 x 102-7/16”)
- 16 x #8 x 2-1/4” Wood Screw
- 2 x (439) Rafter Corner Right 25.4 x 88.9 x 2601.9 mm (1 x 3-1/2 x 102-7/16”)
- 2 x (430) Strap Short – Large Roof 31.8 x 82.6 x 2170.9 mm (1-1/4 x 3-1/4 x 85-7/16”)
- 2 x (431) Strap Left – Large Roof 31.8 x 82.6 x 1605.6 mm (1-1/4 x 3-1/4 x 63-3/16”)
- 2 x (432) Strap Right – Large Roof 31.8 x 82.6 x 1605.6 mm (1-1/4 x 3-1/4 x 63-3/16”)
- 2 x (442) Rafter Short Right 31.8 x 76.2 x 1040.2 mm (1-1/4 x 3 x 40-15/16”)
- 2 x (441) Rafter Short Left 31.8 x 76.2 x 1040.2 mm (1-1/4 x 3 x 40-15/16”)
- 48 x #8 x 1-1/2” Wood Screw
- 8 x #8 x 2-1/4” Wood Screw
Step-by-step guide for putting up a gazebo: step 11
The roof-to-beam bracket installation for the large roof rafters is precisely the same as for the small rafters and should be repeated.
The exact parts you will need for step 11 are;
- 8 x #8 x 1” Pan Screw
- 8 x #12 x 1-1/2” Pan Screw
- 8 x Roof to Beam Bracket
Step-by-step guide for putting up a gazebo: step 12 through to 16 (roofing panel installation)
It is important to note that gloves are required for this portion of the installation due to the fact that the roofing material may have sharp edges.
Furthermore, only remove the plastic when installing each panel to prevent scuffing of the panels and if you are using a power drill, be careful not to overtighten the roofing screws and damage the roof panel.
Start with the roof rafter assembly (both large and small) flipped over on a table, so the roof-to-beam brackets are positioned at the bottom, and the strap and short strap are on top. When installing the left long panel, ensure it is flush to the rafter corner left,and the holes are centered in the rafter.
Do take note that there will be a slight overhang on the facia beam assembly. Overlapping the ribs lay the right panel in the same fashion as you did on the left. Once both the left and right panels are aligned, attach them to the roof rafter assembly using four roofing screws. Repeat this technique with all four roof rafter assemblies.
When considering step 14, part 2place the left short panel onto the roof rafter assembly as you did the other panels and again, make sure it is flush to the rafter with some overhang beyond the fascia beam assembly. Do the same with the right short panel.
It is very important to note that the panels do not have to be flush to the sides of the rafters; however, they can not overhang at all. If need be, remove any roofing screws and adjust the panels accordingly, tightening the screws once again when completed.
The exact parts you will need are;
- 2 x Long Panel Left
- 2 x Long Panel Right
- 8 x #8 x 1” Roofing Screw
- 2 x Short Panel Left
- 2 x Short Panel Right
- 62 x #8 x 1” Roofing Screw
- 2 x Roof Edge Left 72.2
- 2 x Roof Edge Right 72.2
- 4 x Ridge Clip 102.5
- 4 x Weather Seal
- 34 x #8 x 1” Roofing Screw
- 20 x #7 x 18 mm Wood Screw
- 2 x Middle Panel
- 2 x Long Panel Left
- 2 x Long Panel Right
- 8 x #8 x 1” Roofing Screw
- 2 x Short Panel Left
- 2 x Short Panel Right
- 84 x #8 x 1” Roofing Screw
- 1 x (463) Spacer Top 31.8 x 81.6 x 574.7 mm (1-1/4 x 3-3/16 x 22-5/8”)
- 3 x #8 x 2-1/4” Wood Screws
- 2 x Roof Edge Left 72.2
- 2 x Roof Edge Right 96.2
- 4 x Ridge Clip 102.5 4 x Weather Seal
- 40 x #8 x 1” Roofing Screw
- 20 x #7 x 18 mm Wood Screw
Step-by-step guide for putting up a gazebo: 16 through to step 24 (roofing panel installation to the gazebo)
You will need four people and three stepladders to attach the roof panels to the gazebo frame. Place an 8′ ladder in the center of the frame assembly. Place the other two on either side of the beam assembly. Have two people pass the roof rafter assembly over the frame assembly to the people on the ladders based within the frame assembly. Make sure that one person always remains at the center to support the peak of all the roof panels.
As one person continues to hold up the panels in the center of the frame assembly while on the ladder, move the second roof panel assembly into place next to the first, and make sure the corners of the roof assemblies are flush and the roof rafter corners are flushed together. Then starting at the bottom, connect the two roof panel assemblies with three hex bolts.
If the corners or bolt holes are not perfectly aligned, have the person in the center push up on one or more of the roof panel assemblies as necessary. When everything is lined up a third person can tighten the bolts starting at the corners and working towards the peak. Repeat this with the third roof panel.
When lifting the last roof assembly that has no roof-to-beam brackets in place, the person situated in the center needs to push up on the peak loop to raise the peak cap to make room for the fourth roof panel assembly. This is so it can be slid into place easily. Take note that you may have to shift and wiggle the assembly to get the fourth roof panel to fit into place.
When everything is lined up level and square, have someone attach the roof panel assemblies together at each fascia beam end and then attach the roof to post brackets.
The exact parts you will need for this step are;
- 3 x 1/4 x 2-3/4” Hex Bolt (1/4-5/16” large washer x 2, 1/4” lock nut)
- 3 x 1/4 x 2-3/4” Hex Bolt (1/4-5/16” large washer x 2, 1/4” lock nut)
- 1 x Roof Peak Set
- 2 x Carriage Bolt
- 2 x Contoured Washer
- 2 x Peak Loop
- 2 x Spring Clip
- 2 x 1/4”Nut
- 1 x Peak Cap Long
- 2 x Peak Post
- 4 x Roof Peak Brackets
- 6 x #10 x 1-1/4” Pan Screw
- 6 x 1/4 x 2-3/4” Hex Bolt (1/4-5/16” large washer x 2, 1/4” lock nut)
- 3 x #8 x 1” Pan Screw
- 3 x #12 x 1-1/2” Pan Screw
- 3 x Roof to Beam Bracket
- 8 x #8 x 2-1/2” Wood Screw
- 8 x #8 x 1” Pan Screw
- 4 x Corner Cap
- 16 x #8 x 3/4” Sheet Metal Screw
- 28 x #12 x 1-1/2” Pan Screw
- 10 x #10 x 1-1/4” Pan Screw
Step-by-step guide for putting up a gazebo: 24 through to step 26 (roofing panel installation to the gazebo)
At this point, the gazebo should be 95 percent complete, and you should now just need to consider attaching the ridge caps, tie wrap brackets, metal hooks, caps, and plaque. This will not need the help of any additional people, and once this is complete, your gazebo should be ready to house any sort of event you were hoping to host.
The exact parts you will need to finish the construction of the gazebo on your deck are;
- 4 x Ridge Cap Long 81.5
- 4 x Ridge Cap Short 25.2
- 8 x #8 x 3/4” Sheet Metal Screw
- 2 x (461) Tie 31.8 x 88.9 x 2336.8 mm (1-1/4 x 3-1/2 x 92”)
- 20 x #10 x 1-1/4” Pan Screw
- 4 x #10 x 2-1/2” Pan Screw
- 4 x Tie Wrap Bracket
- 2 x 50 mm Hooks 1 x Eye Lag
- 2 x #8 x 1” Pan Screw
- 1 x Gazebo ID Plaque
Conclusion
For the most part, installing a gazebo on your deck will be easy to accomplish if you have the necessary tools, space on your deck, and a little bit of patience. We found out that there are many varieties of gazebos that you can opt to build if you are able to, but the most common DIY ones available are from Yardistry that millions of people opt for as their first choice.
The most common type of gazebo is a pavilion-styled gazebo that is 12 x 14 and is made from wood, and has a metal alloy tin roof. Hopefully, if you are reading this, then you should be able to install your gazebo on your deck due to the fact that, for the most part, the instructions are very similar for many DIY gazebos.
This means that if you read through this article, you will have an understanding of how to install one on your deck, and due to the Yardistry 12 x 14 being the most popular DIY gazebo in the world, you probably already have it and are looking for help with the installation, or you are deciding whether to purchase it.
Learn more!! see our article The Ultimate Guide To Choose And Install A Gazebo for more information