At some point, you are going to see cracks and screws popping out in your drywall. Unfortunately, they are quite common and can be an eyesore, but many people would agree that they are inevitable. An average house requires around 25,000 to 35,000 screws, and while a dozen popping out is a normal occurrence, why does it happen at all?
Drywall screws pop out because they might be installed too deep, compromising its ability to keep the drywall panel in place. The studs where the drywall is attached can also contract and expand due to moisture and temperature, creating a gap, which can cause the screw to move eventually.
If you are having issues with your drywall screws and you want to understand why they are popping out, read on! The rest of this article will also discuss how you can fix them on your own, and how you can prevent them.
Why Do Drywall Screws Pop Out?
Drywall is installed by using screws to secure the panels to the studs. However, it is not unusual for the screws to loosen up and pop out over time, even if the screws were installed just deep enough below the surface. For newly constructed houses, this can typically happen within the first year. You may think that is the result of a bad construction job, but it can really happen as the house settles.
Screw pops are not a big deal, and they are an easy fix for your inner DIYer! Still, no one wants to see bulges in their drywall, and they are a hassle more than anything.
But what causes these drywall screws to pop out?
Drywall Screws Were Installed Too Deep
The drywall fastener’s head is meant to hold the panel and ensure that it stays attached to the stud, so setting the drywall screw properly to have the right depth is crucial in preventing any screw pops.
A drywall panel’s surface is also thin and paper-like, so if you install it too deeply, it may likely penetrate and break through that layer. If that happens, the screw’s ability to secure the drywall in place is compromised. It also weakens the screw, which may cause it to pop out.
Wood or Drywall Movement As Your New House Settles
If you just moved into your new home, your house still needs time to settle. As a result, the materials that were used may give a little, including screw pops, which may happen in the first year of construction.
The lumber or wood framing used to build your house may contain moisture due to open-air exposure during storage or delivery. As the wood dries over time, the studs behind the drywall may twist or shift a little, which can lead the screws to move as well. When the fastener used to hold the drywall sheet moves, the joint compound that covers it loosens up too.
That is when you see a bulge on the surface, and even worse, you may see the screw head if the compound fully cracks. But you do not have to worry because this is usually only a cosmetic issue, as most of the common causes are.
Studs Expand and Contract Because of the Temperature
Newly constructed homes need time to settle, but houses, in general, never really stop moving. Drywall screws can pop out as the studs (typically made of wood) constantly expand and contract due to the temperature change.
If it is hot or humid or when you are heating your home, the studs expand after it absorbs the moisture. On the other hand, in dry conditions or if you are cooling your home, they contract as the moisture is released. As the temperature fluctuation continues, a gap can appear over time, causing the screw to move outward.
Additionally, when your house sits on expansive soil, during the rainy season, the soil may expand and lead to structural movement. It may then move again when it dries, which is more serious since it is a structural issue, and you could be looking at constant repair jobs for more than screws popping out.
Too Much Moisture in the Drywall
Drywall can get exposed to and absorb moisture in the open-air before it gets installed, or it may get damp or wet when delivered to your home while it is raining. When any of these happen, the structural integrity of the drywall is compromised, and you get a soft and weak core.
Your drywall may also soak up more moisture and even trap it when it gets painted or spray painted. Then, when it is installed and eventually dries out, you can expect to see screw pop-outs.
Not Using the Right Length of Drywall Screws
If you do not use the correct drywall screw length, the possibility of it popping out, later on, is greater.
If you use a longer screw than what is ideal, when the framing lumber dries and shrinks, it is likely to pop out. This is because long screws are sometimes harder to drive in straight, which results in either being set too deep or not deep enough; if they are crooked, they can tear the paper-like surface on one side. So, if there is shrinkage and an opening is created, the movement can be a bit more extreme.
At the same time, if you use a short screw that can barely pierce through the stud, it will likely pull loose over time, which leaves you with possibly more bulges on the surface. If you want to avoid as many pops as possible, continue reading and find out the recommended drywall screw size.
Not Enough Screws Were Used
Another reason why your screws are popping out is that your installer did not use an adequate amount of screws to attach the drywall panels to the studs, which means that they are not attached securely enough, and can cause movement everywhere.
If you discover this too late, you are likely to see more pops than is normally expected.
Truss Uplifts
If you happen to see screws pop out in your wall, you should check for bulges on your ceiling, which may show a structural issue. Because of seasonal changes and temperature fluctuations, your home’s roof trusses may move or lift a bit, which puts stress on your drywall, causing screws to pop out. You may even see cracks between your ceiling and wall.
How To Fix Drywall Screws Popping Out
Since these issues are cosmetic rather than structural, and can easily be repaired, don’t automatically assume that you can fix this simply by popping the screws back into the drywall.
Let us go over the steps that you can do to fix drywall screw pop-outs.
Remove the Old Screw
Once you find the spot where the screw is popping out, use a drywall knife to remove the mud or drywall compound. Here is where you might be tempted to take a shortcut and just do touch-up work on it and paint over it. But that will cause a blister, especially whenever someone presses against it.
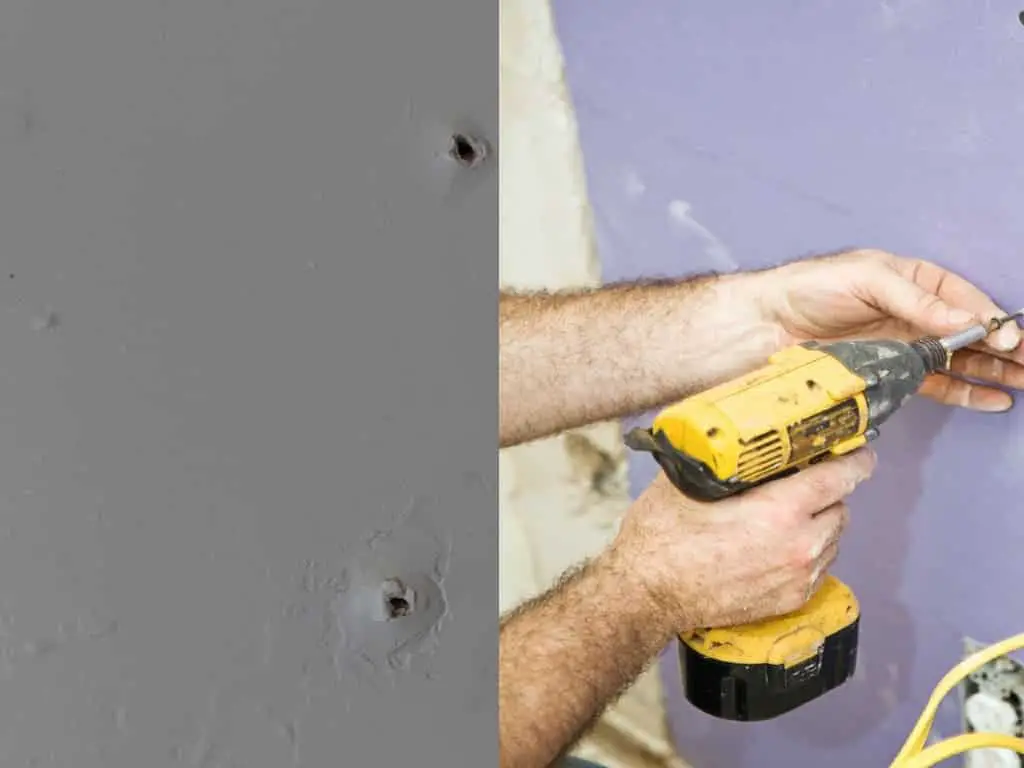
The next thing that you should do is pull out the old screw. You can use your trusty old screwdriver for this, or if you want to make it easier on yourself, use a drywall screw gun or cordless screwdriver, such as this TACKLIFE Cordless Screwdriver.
If the paper is damaged, you need to cut all the loose paper out first to ensure there is no blister. You can do this by using something like this Internet’s Best Premium Utility Knife.
Secure the Loose Drywall and Install New Screws
The next step is to secure the loose drywall panel back into the stud. To do this:
- Get your drywall screw gun or cordless screwdriver and drive in the old screw back into the existing hole.
- Install one new screw above and another new screw below the old one, each about an inch away.
- Put them just below the surface and not deep enough to break the paper.
This step ensures that there will not be any more movement with the drywall surface and mud later on.
Fill the Space Over the Screw Heads With Drywall Compound
Now that the drywall is secured, the next step is to figure out how you can make the area you just worked on look like it is not a patch. The key is to fill the screw heads with a drywall compound, such as this US Gypsum Sheetrock 45 Joint Compound. It is a 45-minute compound that must be mixed right before use. You only need to apply one layer, and within an hour, you can proceed to patch and paint over the area.
In terms of what compound to use, you can use whatever you prefer. Many professionals recommend five-minute quick-set types for small patches because you can apply a second and third coat within minutes of each application. But not all quick-set muds are the same; some have poor adhesion that needs additional glue. Vancouver Carpenter shares a pro tip about adding adhesive to a quick set type of compound:
Aside from the compound, you need a drywall knife and a tool to hold the mixture, such as this Marshalltown Aluminum Hawk. Before starting, take your knife and pass over the three screws. Make sure that you do not feel any of the screw heads, as that would indicate that they are deep enough.
Now, take a bit of mud and press it over the three screw heads. The middle hole might be bigger than the other two, and if it bubbles up, apply a little extra compound on there. Try to make the application very smooth, so you will not need to sand a lot. Then, let it dry.
Sand the Area
Once your wall is dry, feather out the edges using a sanding sponge. Make sure that you get rid of any ridges, and when you see that the color starts to blend with the surrounding area, you know that you have it nicely feathered. Then, add a few extra up and down motions through the middle, and check with your hand if there is any ridge that you can still feel.
At this point, you may see that the screw hole spots are still dark. That means they are not totally dry yet, but that is nothing to worry about because the compound is a hardener, and your paint will just sit on top of the area.
Paint the Wall
If it is only a small patch, you do not have to paint the entire wall, which can be quite expensive and time-consuming.
To begin, apply drywall primer to the area you worked on, with either a paintbrush or a roller, depending on how big the repair is. The primer seals the joint compound and preps for painting. If you do not use a primer, the patch will absorb the paint.
Next, apply the paint. If it is just a small area, you typically do not need to apply very many paint. Then, to add a little texture so that it blends more, you can use a paint roller sleeve and roll it over the edges.
Call a Professional
If you think you can’t fix the drywall screws that are popping out, or you do not have the basic DIY skills or patience to do this yourself, you might want to call a professional who can do it for you. If there are several screw pops that need to be fixed, especially if they are everywhere, you may need to hire a professional, such as a drywall contractor, as it may indicate a more serious problem.
How To Prevent Drywall Screws From Popping Out
Although it seems inevitable, there are some things that you can do to prevent drywall screws from popping out.
- Avoid installing screws too deep into the drywall. The screw head should be visible from the surface covering the panel but should be deep enough that the screw shank is completely in the drywall panel.
- Use the correct screw length. Bob Vila recommends that you choose a screw that can pierce through the stud by ¾ of an inch (1.91 cm) as a minimum. If you are using a half-inch (1.27-cm) thick drywall, you should use a screw that is at least 1 ¼-inch (3.18-cm).
- Do not overdo the screws. Using too many screws does not necessarily make it better. West Fraser suggests that “every 16 inches is standard with one fastener in each corner, and two in the field.” You should begin on one end, then install screws across the center, and then work at the far end, which ensures that the drywall is pulled closer to the framing.
- Control the moisture. Studs absorbing and releasing moisture can’t be prevented, but what you can do is limit how much they get exposed to. You can use a dehumidifier (relative humidity at 40-50%) to control the moisture vapor in your home. Without temperature fluctuations, the expansion and contraction of the screws will be reduced.
What is the best option, Drywall or cement board for fireplace
Final Thoughts
Drywall screws popping out can happen from time to time, even to a newly constructed home. The most common reasons why it happens are that the screws are set in too deep, the studs constantly contract and expand due to moisture and changes in temperature, and the wrong screw length is used.
Fortunately, you can easily fix screw pops by removing the old screw, driving in new screws, filling the holes with a drywall compound, then sanding and painting the repaired area.