Drilling is not without complications, and one of the most frequent is the drill bit sliding. This is generally not a drill fault, and therefore is a simple repair. How can you prevent this from happening?
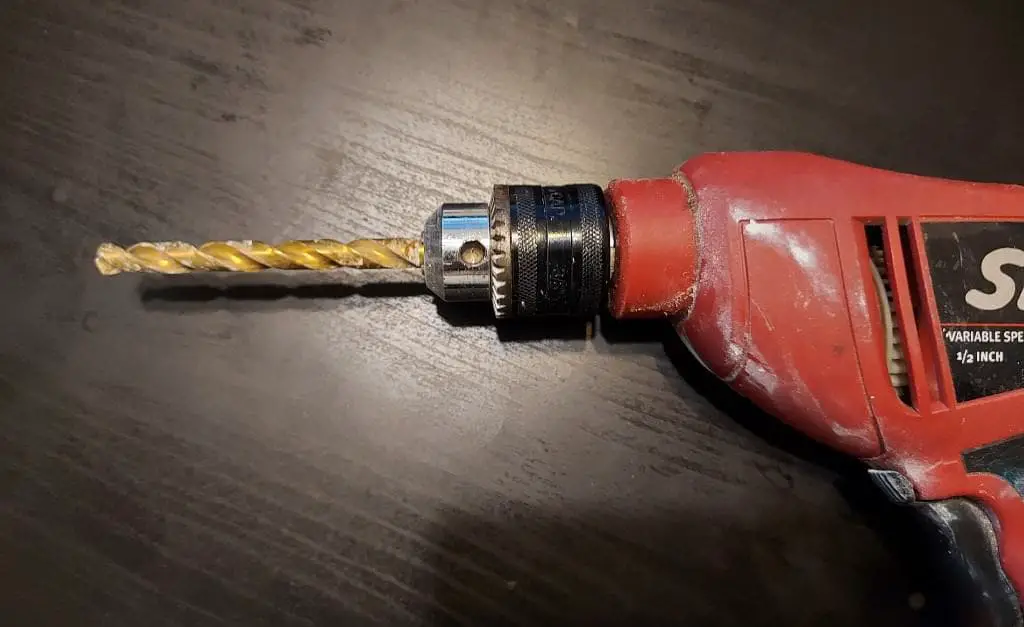
Your drill bit keeps slipping because the chuck is worn out and cannot hold the drill locked in place. Another explanation is that you did not properly secure the drill bit before you began working. At home, you can change the chuck and ensure the drill bit is securely fastened.
This post will discuss why your drill bit keeps sliding and how to determine which issue affects you. Additionally, I will demonstrate drilling tips to discourage slipping.
Why Would a Drill Bit Keep Coming Loose?
Your drill bit keeps coming loose if your drill chuck is dirty, not fastened, or worn out and in need of replacement. Keeping your drill properly maintained, securing your chuck properly, and replacing parts as required will keep your drill bit tightly in place.
Maintaining a clean drill chuck guarantees that your bits never slide. This is a fairly straightforward procedure that takes just a few minutes.
Other problems, on the other hand, need more sophisticated methods to eliminate the slipping.
The Drill Chuck Is Dirty and Needs To Be Cleaned
When the grooves of the chuck get clogged with debris, the bit will struggle to retain a firm hold.
To check your chuck for dirt, take these steps:
- Remove the screw in the chuck’s middle. To locate the screw, you must widen the jaws of the chuck. If there is no screw, omit this step.
- Disconnect the chuck.
- Examine for excessive filth.
- If no screws hold your chuck, you may need to pry it off using an Allen wrench.
- Clean the chuck with a non-corrosive mixture and a dry rag. Avoid directly spraying the chuck, as this may cause the bearing oil to be removed deeper within the chuck, causing it to lock up more frequently.
- Before reinstalling the component, coat the screw with thread-locking fluid. This will aid in the screw’s connection to the chuck and ensure its security.
The Drill Chuck Is Not Fastened
If the chuck is not secured when you use your drill, the bit will slip due to the vibrations. But when you lock the chuck into the drill, the vibrations generated during operation have no detrimental effect on the bit.
You can secure the chuck by rotating it in one direction until you hear several clicks. Following that, spin the chuck in the other direction until you hear one click.
Your Drill Chuck Is Worn Out
With continued use, the chuck will deteriorate and become smooth. Naturally, a smooth chuck will allow the drill bit to slide very readily.
In this case, the best course of action is to replace your chuck.
If you drill often, I would suggest upgrading to a chuck that requires a key to tighten. For those who generally do home repairs, it is preferable to use a keyless chuck.
To begin the disassembly of a keyless chuck:
- Disconnect the tool and remove the battery.
- Use the chuck key to release the jaws of the current drill chuck completely and then spin the reverse-threaded screw clockwise to remove it.
- The chuck will readily dislodge, and you may replace it by repeating the procedures in reverse with a replacement.
Consult the owner’s handbook or contact the manufacturer for the exact method for removing the chuck from your drill. But the previous procedures should work on the majority of models.
Drilling Techniques To Prevent Your Bit From Slipping
To guarantee safety and a flawless finishing look, you must drill with caution. You can review the following guidelines on operating a drill before beginning your next job to avoid sliding.
Choose the Right Drill Bits for the Material
You should always double-check that the drill bit you’re using is the correct type for the material being worked on. Carbon steel is combined with additional materials such as chromium and vanadium to create high-speed steel pieces, which enables the bits to drill at faster rates.
HSS bits are suitable for drilling iron, steel, and other metals, including brass, copper, and aluminum alloys. Additionally, you may use them to drill plastic.
Step bits are conical in form and include an array of cutting blades with different diameters. You can use them to drill thin softwoods, laminates, particleboard, plastics, drywall, and sheet metal.
Step bits are excellent for jobs that need the cutting of holes of different sizes in a single project.
The following bits are particularly well-suited for wooden objects:
- Flatwood bit
- Hole saw
- Lip and spur bit
- Masonry bit
When in doubt about which bit to use, check the drill’s box for recommended and prohibited attachments for different projects.
In general, a decent drill bit set should contain at least a modest index of parts capable of drilling through wood and even specific metal projects.
Retain Sharp Drill Bits
Sharp drill bits allow for safe, easy work, so maintain them using a bench grinder. Twist pieces are what you’re likely to have, and most bench grinder tool rests have a precast groove set at 31° specifically to sharpen twist bits.
Start Drilling Gently
It helps to begin drilling slowly to ensure that the bit does not stray from the center point. Throughout your project, you may progressively raise the pace.
Slow to medium speeds are ideal for drilling metal and masonry; high rates are better for drilling through wood.
Never Force the Drill
If you force the machine, it will not drill efficiently. Excessive pressure is likely to dull the bit, which may prompt you to apply even more stress, resulting in slippage.
It would be best to drill more slowly as the bit reaches the far side.
If you encounter resistance in a particular location, you may want to remove the drill and clean the hole before drilling again.
When drilling wood, wood flakes get trapped in the flutes of the bit, generating heat. The higher the temperature of a drill bit, the quicker it dulls, which means that you must clean the bit regularly while dealing with this material.
And occasionally, when the drill goes through the far side, a non-secure workpiece will spin on the drill if you’re using too much force. The bit is sure to slide with this extra movement.
Take care to avoid pushing your drill in any instance.
How To Stop Drill Bit Slipping on Metal
With metal, the surface is often slick and there is a high possibility that your drill bit may come loose and create a large scratch. To avoid this, first, create a dimple with a sharp item. For instance, place the tip of a center punch on the desired location for the hole and tap it with a hammer to create a tiny dent in the metal.
Placing the drill within the dent significantly lowers the likelihood that it will slide off.
Alternatively, you may use a pillar drill to maintain the precise position of the bit. This requires that the material through which you want to drill fits underneath the large tool.
How To Take Care of Drill Chuck To Prevent Slipping
If you’ve just purchased a new chuck or are attempting to preserve an older one, there are many things you can do to protect the chuck’s integrity and avoid slippage.
- Ensure that you grease the chuck often.
- For professional repairers, you may need to oil your chuck every few days. However, if you plan to use the instrument around your home, an oil may be added before each usage.
- You should ensure that you are using the proper amount of pressure while tightening the chuck. More strain on your chuck will result in additional wear and tear. Therefore, apply sufficient force to insert the chuck without jamming it.
Final Thoughts
Repairing a sliding drill bit often requires a few adjustments to your drilling etiquette and maintenance procedures.
You can take solace in the fact that you do not have to replace the whole drill if you are experiencing constant slippage. Instead, call your local department shop to get a new chuck if required.
For more tips on preventing your drill bit from sliding during home improvement tasks, The Honest Carpenter offers a video on common drilling errors to avoid: